
Most damage to a stored wedding dress doesn't happen in a moment. It happens in slow motion, over years, through a process quiet enough that nobody notices it's underway until the result finally becomes visible.
That process centers on lignin, a compound present in most ordinary paper, which gradually breaks down into acid and transfers into fabric through nothing more dramatic than sustained contact. Wedding dress preservation exists specifically to interrupt that slow-motion process, and understanding it is what turns a vague promise about "the right materials" into something you can actually verify.
What "Acid-Free" Means
"Acid-free" describes the tissue's pH when manufacturers produce it, but the term alone does not guarantee archival quality. For long-term dress storage, the tissue should also be lignin-free, since lignin can break down and form acids as it ages. Some archival tissues include an alkaline buffer, often calcium carbonate, that helps neutralize acids entering the storage environment.
There are two main options:
- Buffered acid-free tissue: contains an alkaline reserve and often suits cotton, linen, and many synthetic materials.
- Unbuffered acid-free tissue: has a neutral pH without an added alkaline reserve and is commonly chosen for silk, wool, sensitive dyes, and mixed-material garments.
Why Does the Distinction Matter?
Wedding dresses rarely contain only one material. A dress may combine a silk bodice with synthetic lining, lace, metallic thread, beads, or wool-based details. Because these materials can react differently during long-term storage, a preservation specialist should choose the tissue based on the actual construction of the dress.
When discussing preservation, ask more than "Is the tissue acid-free?" Also ask:
- Is it lignin-free?
- Is it buffered or unbuffered?
- Which type will touch the dress directly?
Those answers reveal if the provider has selected materials for your specific dress rather than using one packing method for every dress.
Ordinary Tissue and Cardboard Are Acidic in the First Place
Ordinary tissue paper and cardboard often contain wood pulp and lignin. Lignin gives wood its strength, but it can break down when exposed to oxygen, light, heat, and humidity. As these storage materials age, they may become acidic and affect anything resting against them.
Over time, acidic materials can contribute to:
- Yellowing or discoloration.
- Weakened or brittle fabric fibers.
- Darkened fold lines.
- Deteriorating tissue and cardboard.
- Acid transfer where the dress touches the packaging.
You can see a similar process when a newspaper turns yellow and fragile as it ages. A dress stored in ordinary tissue faces that contact continuously, often while the box remains closed for years.
A box can look clean and sturdy without providing archival protection. For long-term dress storage, choose materials specifically identified as acid-free and lignin-free, then confirm that every layer touching the dress meets those standards.
How the Acid Actually Gets Into the Fabric
Acidic compounds can transfer from ordinary paper or cardboard into fabric through prolonged direct contact. Humidity can encourage that movement, especially when the dress sits tightly against the same material for years. The damage develops gradually, which is why you may not notice it until discoloration or weakness appears.
The greatest risk often occurs where:
- Fabric presses directly against the box.
- Folds remain compressed in one position.
- Ordinary tissue touches the dress.
- Moisture and temperature fluctuate.
- Layers receive little protective padding.
Acid-free, lignin-free tissue creates a safer barrier and cushions each fold. Proper packing also supports the bodice and prevents sharp creases without cramming the dress into the box.
The tissue and box must work together. If either contains acidic material, the dress may still face prolonged exposure.
Yellowing Often Shows Up at the Folds First
Yellowing often shows up at the folds first. These areas remain pressed against tissue or box lining while also carrying the stress of a fixed crease, exactly where contact is most sustained.
However, fold-line discoloration can have several causes, so the pattern alone does not prove acid transfer. Use the pattern as a clue:
- Yellow or tan lines following folds: may point to prolonged contact with acidic materials, oxidation, or stress along the crease.
- Even discoloration across the dress: may suggest general aging, environmental exposure, or unsuitable storage conditions.
- Isolated yellow or brown spots: often indicate residue from food, drinks, perspiration, or body oils that changed over time.
Do not assume the marks are permanent or try to treat them yourself. A wedding dress specialist can examine the fabric, identify likely causes, and determine if cleaning or restoration may improve the discoloration.
It's Not Just the Tissue: The Box Matters, Too
Acid-free tissue protects only one part of the storage system. The box surrounding the tissue also influences the long-term environment of the dress. Standard cardboard often contains wood pulp and lignin, which can form acids as the material ages.
Wrapping a dress in archival tissue does not fully solve the problem if you place it inside an ordinary box. The tissue adds a barrier, but the dress still remains enclosed with a potential acid source.
Keep these two risks separate:
- What remains on the dress: perspiration, skin oils, food, and drink residue may oxidize and discolor the fabric over time.
- What surrounds the dress: acidic tissue or cardboard may contribute to yellowing, weakened fibers, and darkened fold lines.
One does not cancel out the other. A professionally cleaned dress still needs suitable packaging, while an archival box cannot neutralize residue left on an uncleaned dress. Wedding dress cleaning addresses the residue side of that equation specifically, a different issue covered in more depth elsewhere.
A complete storage system should include:
- Professional cleaning before packing.
- An acid-free, lignin-free archival box.
- Appropriate buffered or unbuffered tissue.
- Tissue padding between folds and inside the bodice.
- Enough space to avoid sharp creases or compression.
Before choosing preservation, confirm that both the tissue and box meet archival standards. The materials touching and surrounding your dress should work together from the beginning.
A Quick Way to Check What You're Being Given
You don't need a chemistry background to evaluate any of this. You need one direct question: are the tissue and the box specified, by name, as acid-free and lignin-free, on the product itself or in your paperwork? A few things worth checking before you commit to a provider:
- Genuine acid-free tissue is labeled as such directly on the packaging, not described only in vague terms such as "archival" or "museum-quality" with no specifics behind them.
- Ask if the box is acid-free, too, not just the tissue inside it. Plenty of providers get the tissue right and stop there.
- If your dress has silk or wool sections, ask if buffered or unbuffered tissue is used against those fabrics specifically.
- Notice how quickly and specifically someone answers. Hesitation on a simple material question is worth paying attention to.
A provider who can walk you through exactly what touches your dress, without hedging, tells you something about how carefully the rest of the process is handled, too.
From Cleaning to Preservation, Trust Your Dress to Sage Cleaners
Acid-free tissue only protects your dress when every layer around it supports the same goal. Sage Cleaners begins with fabric-specific cleaning, then wraps your dress in protective tissue and places it inside an acid-free preservation box to help guard against yellowing, set-in creases, moisture, and environmental damage.
Protect every part of your dress with Sage Cleaners, not just the fabric you can see. Our specialists customize the cleaning and wedding dress preservation process around its material, construction, embellishments, and condition, while handling the preservation materials and packing for you.
For anyone in Brandon, Florida, looking for a professional Wedding Dress Cleaning and Preservation Service that gets the materials right from the innermost fold to the outermost box, schedule your FREE Pickup and Delivery Service today and let Sage Cleaners handle it correctly.
Phone: (813) 543 8380
Pickup by text: Text "Pickup" to (813) 819 6658
Email: care@sagecleaners.com
A formal dress usually goes wrong in one of two specific ways: it's too big, or it's too long. Sometimes both. Neither one means you picked the wrong dress, and neither says anything about your body. It means the dress needs a tailor's attention, the same normal step most formal wear goes through before an event, not a fix for something you did wrong.
Here's exactly what a tailor can do for each problem, where the real limits are, and how much time to allow.
Too Big: The Alterations That Take a Formal Dress In
Tailors can often reshape a loose formal dress without rebuilding it. Taking a dress in one or two sizes is commonly feasible, but the final answer depends on its construction, not the number printed on the label.
Your tailor should examine:
- The side and back seams.
- The zipper and lining.
- Boning, cups, or corset-style support.
- Lace, beading, appliques, and patterned fabric.
- The balance between the bust, waist, and hips.
Most fit problems involve excess room through the body or gapping around the neckline. Each requires a different approach.
Bodice, Waist, and Hip Taken In Through Side Seams
Tailors often begin at the side seams because these seams control the dress's shape through several key areas. During your fitting, the tailor pins the bodice, waist, and hips separately. This creates a precise outline instead of reducing the entire dress by one uniform amount.
What the alteration may involve:
- Pinning the dress while you stand naturally.
- Checking the zipper, hem, and side-seam alignment.
- Marking a gradual new seam line.
- Restitching the outer fabric and lining.
- Pressing and reinforcing the finished seams.
The complexity increases with the structure of the dress:
- Simple, unlined style: the tailor may only need to reshape and finish the existing seams.
- Lined dress: the lining requires a corresponding adjustment.
- Structured bodice: boning, cups, or support panels must match the new fit.
- Embellished design: the tailor may need to remove and replace beads, lace, or appliqués near the work area.
Do not expect your bust, waist, and hips to need equal reductions. Ask your tailor to shape each area independently. At the fitting, sit, walk, breathe deeply, and raise your arms. You want definition without pulling, twisting, or restricted movement.
Shoulder and Bust Adjustment for Gapping Necklines and Loose Fits
If the neckline stands away from your body, narrowing the waist may not solve it. The problem could come from long straps, broad shoulders, oversized cups, or extra fabric near the armholes.
Possible corrections include:
- Shortening or repositioning straps.
- Narrowing the shoulder seams.
- Reshaping the bust through existing bodice seams.
- Adjusting cups, darts, or interior support.
- Removing excess fabric near the neckline or armhole.
Show your tailor when and where the gap appears. A neckline may sit correctly while you stand but shift when you sit, walk, or raise your arms.
If the dress needs to come in by more than two sizes, the work may become a partial reconstruction. Your tailor might need to reset the zipper, reshape the armholes, remove panels, rebuild the lining, or reposition decoration.
Before committing, request a clear estimate, timeline, and fitting schedule. You should understand which elements will change and whether the finished proportions will remain faithful to the original design.
Too Long: How Formal Skirts Are Actually Shortened
How to shorten a formal skirt starts with its fabric and construction. A folded hem can distort chiffon, lace, tulle, or pleats. Your tailor inspects the layers, lining, decorative border, train, and hem structure.
Wear your event shoes and intended undergarments to the fitting so the tailor can mark the correct length.
Chiffon, Lace, Tulle, and Pleated Skirts, Different Fabric, Different Method
- Chiffon: your tailor creates a narrow rolled or baby hem, handling each layer separately to prevent puckering and bulk.
- Lace: the tailor may remove the decorative border, shorten the skirt, and reapply the edge. Scallops or motifs can limit the final length.
- Tulle: because tulle generally does not fray, the tailor can trim each layer without folding the edge. Staggered layers preserve softness.
- Pleated skirts: the tailor evaluates the pleat style before cutting. They may shorten from the waist to preserve the lower edge or reset the pleats at the hem.
Before approving the work, ask: “Will the lining, outer layers, and train need separate adjustments?” A clear plan prevents uneven layers and protects the dress's movement.
Shortening Straps and Torso Length on Floor-Length Gowns
A gown may run too long through the torso. Hemming will not fix a low bodice, gaping neckline, or waist seam that falls below your waist.
Your alteration options:
- Shorten the straps: your tailor lifts the bodice to reduce gapping and improve neckline placement.
- Raise the waist seam: the tailor separates the bodice and skirt, removes excess length, then reconnects them.
- Reshape a seamless gown: the tailor adjusts bodice seams or adds a new waist seam. This complex option may alter the original design.
Fitting tip: Wear your intended bra, shapewear, and shoes. Correct the neckline, armholes, and waist position before marking the hem.
The Trade-Off With Train Length When You Shorten a Formal Gown
A train defines the gown's silhouette. Shortening the skirt evenly can reduce or remove it; preserving it may require a graduated hem that rises toward the front.
Choose before your tailor cuts:
- Remove it: create one consistent floor-length hem.
- Shorten it: keep some movement with less fabric behind you.
- Preserve it: raise the front and sides while maintaining the back length.
Fitting tip: Wear your event shoes and walk in the pinned gown. Check every angle before cutting; removed fabric cannot be restored.
The Honest Limits: When a Formal Dress Isn't Worth Altering
When a dress is too large and too long, the work becomes more than two separate adjustments. Taking in the bodice changes how the gown sits on your shoulders, waist, and hips. That shift can change the skirt balance and hemline.
Your tailor should establish the upper-body fit before finalizing the length.
Expect this order:
- Reshape the bodice.
- Correct the shoulders, bust, waist, and hips.
- Recheck the skirt balance.
- Mark the hem in your event shoes.
- Complete a final movement check.
This process may require multiple fittings, so allow enough time before your event.
Fast-Fashion Fabric, Heavy Embellishment, and Beyond-Two-Size Changes
Not every dress can support extensive reconstruction, or justify the cost.
Watch for these limits:
- Fragile construction: thin fabric, weak stitching, minimal lining, or poorly finished seams may not hold extensive reshaping.
- Heavy embellishment: a tailor may need to remove and reattach beads, sequins, lace, or appliqués by hand.
- Changes beyond two sizes: the work may require resetting the zipper, reshaping armholes, rebuilding the lining, or removing panels.
- Complex internal structure: boning, cups, support panels, and layered skirts require separate adjustments.
Before committing: Request a detailed quote, timeline, fitting schedule, and explanation of possible design changes. Compare that total with the cost of another dress.
A higher bill may still make sense for an inherited, borrowed, designer, or deeply sentimental gown. Base your decision on the dress's personal value, not price alone.
How to Prepare for Your First Formal-Dress Alteration Appointment
- Event shoes: heel height determines the finished hemline.
- Undergarments: bring the bra or shapewear you will wear; each can change the bust, waist, and skirt position.
- Event date: share it immediately so your tailor can schedule fittings and adjustments.
- Honest timeline: mention travel or early pickup needs. Rush work costs more and may not suit delicate fabrics.
At the fitting: Sit, walk, and raise your arms before approving the pinned changes. Your dress should look polished without restricting movement.
The Perfect Fit Starts with an Early Visit to Sage Cleaners
A dress that doesn't fit yet isn't a problem you have to solve alone. Sage Cleaners handles formal-dress alterations for customers across Riverview, Florida, with a straight, realistic assessment of what your dress can take and skilled hands for chiffon, lace, tulle, and beaded pieces alike. If you've searched alterations near Riverview, Florida and landed here, that's exactly the service you're looking for.
Don't wait until the event is around the corner. Call or text +1 813-742-8345 to book a fitting, schedule a pickup, or bring your dress in for an estimate with plenty of time to get the work done right.
Your wedding dress came home from the venue looking spotless. You hung it up, zipped it into a bag, and decided wedding dress cleaning could wait, maybe indefinitely, since nothing looks dirty. That instinct backfires.
Fabric doesn't show damage the same as skin or carpet. Your dress can look pristine under living room light while it quietly breaks down underneath: inside the seams, under the arms, along fold lines pressed flat in a box.
Below are the eight specific damages already happening to an uncleaned dress, exactly where each one shows up, and how long you have before it stops being reversible.
Champagne and Beverage Residues Turn Yellow
Champagne, wine, and lemonade leave stains you can't see on your wedding day. Sugar sits invisibly on white or ivory fabric until it oxidizes, and that takes months, not hours. A splash near your bodice or a drip on your hem waits quietly, then surfaces as a yellow-brown patch. Most brides forget the drink was ever spilled by the time it shows up.
Where it shows up: bodice, sleeves, and hem, anywhere a glass tipped or a toast went wide
Timeline: 6 to 24 months after the wedding
Still reversible: Yes, within the first year. After two years, the sugar bonds to the fiber and becomes part of the fabric's color, not a stain sitting on top of it.
Body Oil and Sweat Break Down Silk Fibers on Hidden Seams
Your underarm seams and the inside of your bodice absorb sweat and body oil for the entire day you wear your dress. This isn't a hygiene problem, it's a chemistry challenge. Silk is a protein fiber, and the salts and acids in sweat slowly break down that protein. You won't smell it or watch it discolor. The fibers just quietly weaken exactly where your dress needs to hold up best.
Where it shows up: underarm seams, the inside of the bodice, anywhere fabric sat close to skin
Timeline: fibers weaken gradually over 1 to 2 years in storage
Still reversible: Only before the breakdown starts. Cleaning removes the residue causing it, but it can't rebuild fiber that's already degraded.
Makeup and Cosmetic Transfer on the Neckline and Bodice
Foundation, powder, and lipstick transfer onto your dress constantly, especially around the neckline and zipper, and anywhere fabric brushes your face during hugs and photos. Cosmetic oils don't rinse out, and they don't fade on their own. They sit in the fibers and darken, especially on silk chiffon or tulle.
Where it shows up: neckline, zipper area, and shoulders
Timeline: a faint smudge becomes a set stain within about 12 months
Still reversible: Yes, if you treat it in the first few months. Oils that fully cure into delicate trim sometimes can't be removed without risk to the fabric.
Grass Stains and Hem Soil from the Ceremony and Dance Floor
Outdoor ceremonies, garden photos, and hours on the dance floor grind grass and dirt into your hem and train. Chlorophyll bonds tightly with fabric, which makes grass one of the hardest stains to lift. The bottom eight to ten inches of your dress usually carries more soil than the rest of the dress combined.
Where it shows up: hem and train, concentrated in the bottom 8 to 10 inches
Timeline: visible immediately, sets deeper the longer it sits
Still reversible: Yes, but only with professional treatment. Home spot cleaning usually pushes the stain deeper into the weave instead of lifting it out.
Overall Yellowing From Natural Oxidation of Untreated Fabric
This is what causes the wedding dress to yellow across the entire dress instead of in patches. Natural fibers of your fabric oxidize with exposure to light, heat, and ordinary indoor air, and silk and cotton blends age this way fastest. Because the color shift spreads evenly, brides often mistake it for the dress just getting old instead of catching it early.
Where it shows up: evenly across the whole dress, not in isolated spots
Timeline: accelerates around any leftover soil, sugar, or oil, worsening year after year
Still reversible: Partially, if you catch it early. Once oxidation sets in across the whole dress, it's one of the hardest issues on this list to undo.
Mold and Mildew From Moisture Trapped in Improper Storage
Any moisture in your dress, from humidity, sweat, or a rainy ceremony, becomes a problem the second that dress goes into a sealed box or bag. Mold needs very little moisture to take hold, and a tightly folded dress in a dark, airless space gives it exactly that. You'll usually smell mildew before you ever see it.
Where it shows up: folds, seams, and anywhere fabric presses against fabric in storage
Timeline: musty smell within weeks, visible spotting follows if untreated
Still reversible: Yes, if you catch it at the smell stage. Set mold etches into the fiber and leaves permanent gray or brown spotting.
Why Plastic Garment Bags Make This One Worse, Not Better
Plastic traps moisture instead of releasing it, which turns your garment bag into the humid, airless space mold needs. It also seals in the sugar, oil, and cosmetic residue from the sections above instead of letting them off-gas. Choose a breathable, acid-free garment bag instead. It lets your dress release trapped moisture slowly rather than sealing it in.
Fabric Weakening at Fold Lines That Eventually Splits
Every stored dress gets folded somewhere, whether it's a boutique box or a garment bag in your closet. Fabric held in the same crease for months or years takes on stress for which it wasn't built, and any trapped residue speeds up the wear. Your dress can look completely intact going into storage and come out split exactly along that fold.
Where it shows up: skirt folds, bustle points, anywhere the dress was creased flat
Timeline: splits typically appear after a year or more in storage
Still reversible: Preventable more than fixable. Acid-free tissue packed into every fold, plus periodic repositioning, stop one crease from bearing all the stress.
Bead Loss and Thread Deterioration on Embellished Pieces
Beading, sequins, lace applique, and embroidery attach with thread, and that thread wears out faster than the fabric around it. Body oil and sugar residue weaken the thread before it touches the base fabric, so your beaded dress shows damage at the embellishments first, not the seams.
Where it shows up: beadwork, applique edges, and embroidered trim
Timeline: a few loose beads in year one become visible gaps by year three
Still reversible: Yes, if a specialist resecures loose threads early and cleans out the residue causing the breakdown.
What's Still Reversible If You Act in the Coming Weeks
Not everything on this list is permanent. Act soon and you can still reverse:
- Fresh sugar, oil, cosmetic, and dance floor residue: lifts with professional cleaning within the first several months.
- Loose threads and small bead gaps: a specialist resecures them before you lose more beads.
- Musty odor from early moisture: clears before it turns into visible mold spotting.
- Light, even yellowing that hasn't set for years: lifts with the right solvent and process.
Wait, and that window closes. Book your wedding dress cleaning before “still reversible” turns into “permanent”.
What Belongs Only With a Cleaning Specialist, Not a Regular Dry Cleaner
Your wedding dress isn't like everyday dry cleaning. A standard dry cleaning press uses general solvents built for suits and everyday wear, not silk chiffon, hand-sewn beading, or decades-old lace. A specialist inspects your fabric and trim before touching any solvent, tests an inconspicuous spot first, and picks a process based on what's actually in your dress instead of running every dress through the same cycle.
This matters most for beaded, appliqued, or antique dresses, where the wrong solvent can do more damage than the original stain. If your dress is headed for long-term preservation, choose a specialist trained specifically in bridal fabric.
Every Day Counts – Bring Your Dress to Sage Cleaners Today!
Sage Cleaners has earned the trust of Tampa, Florida brides who want an honest look at their dress before anyone touches it with a chemical. We inspect every dress first, treat it based on what's actually in the fabric, and never rush it into a box just to clear the rack. Search for wedding dress cleaning in Tampa, Florida that brides trust with sentimental dresses, and our inspection-first approach is the difference.
Schedule a wedding dress cleaning intake with Sage Cleaners, or call our team to describe your dress so we can help you plan the next step.
Phone: +1 813-742-8345
Email: care@sagecleaners.com
Summer is the perfect time to fire up the grill, gather your favorite people by the pool, and soak up every bit of sunshine. But while you're making memories outdoors, your patio cushions are quietly taking a beating, from blazing heat, surprise rain showers, and all those long, sticky afternoons.
Over time, continuous sun exposure, trapped moisture, and daily wear can do more than just fade the fabric. They can warp the shape, invite mildew, and leave your cushions looking (and smelling) like they’ve had a rough season.
You can’t control the weather, but you can control how well your cushions handle it. Whether they’re on a shaded deck or in full sun, every outdoor setup can benefit from a little extra care. And you don’t need to overcomplicate it.
Let’s walk through the best ways to care for your patio cushions all summer long.
(1) Brush Off Debris Regularly
When you’re outside every day, it’s easy to overlook the leaves, dust, pollen, and crumbs that settle into your cushions. But if you let that stuff sit, it starts to wear down the fabric and invites mildew and bugs to stick around.
A quick once-over now saves a big clean-up later. Plus, brushing off debris helps your cushions look fresh and inviting every time you step outside.
How to Properly Brush and Shake Your Cushions
To keep things simple and effective, all you need is a soft-bristle brush or your hands and a few spare minutes.
- Remove loose debris by lightly brushing from seam to seam.
- Pay extra attention to crevices and stitching where pollen and crumbs tend to hide.
- Give each cushion a few firm shakes to release anything stuck inside the foam or fabric weave.
- Do this once or twice a week to stay ahead of buildup, especially during high pollen days or if you have trees nearby.
(2) Spot-clean Spills as Soon as They Happen
Outdoor fun means snacks, drinks, sunscreen, and sometimes, "oops" spills. The trick is to catch them before they soak in or stain. Acting quickly not only saves you from scrubbing later but also prevents permanent discoloration and odors. And for most patio cushions, a basic soap-and-water solution will do the job just fine.
Steps for Spot-cleaning Cushions the Right Way
Whether it’s food, grease, or a sticky soda spill, the method stays the same: blot, don’t rub.
- Start by blotting the spill with a clean cloth or paper towel to absorb as much liquid as possible.
- Mix a small amount of mild dish soap with warm water and dab the area using a sponge.
- Avoid soaking the cushion. Just lightly dampen it to lift the residue.
- Rinse with a clean damp cloth, then let the area air dry fully in the sun.
(3) Let Them Fully Dry After Rain or Washing
Moisture is one of the fastest ways to ruin outdoor cushions. Even water-resistant materials can grow mold or smell musty if they’re not allowed to dry properly. After it rains, or any time you clean your cushions, drying them thoroughly is non-negotiable. This step alone can double their lifespan.
Best Practices for Drying Patio Cushions Efficiently
Drying your cushions doesn’t have to be complicated, but it does need to be consistent.
- Always stand cushions on their edge in direct sunlight after they get wet.
- If you can, unzip the covers and remove the inserts for faster airflow.
- Never stack wet cushions, because they’ll trap moisture between them.
- Use a towel to press out excess water from soaked areas before leaving them to dry.
(4) Use UV Fabric Spray for Extra Sun Protection
Even though outdoor fabrics are made to resist sunlight, summer’s intense rays still wear them down over time. Colors start to fade, the fabric weakens, and eventually, your cushions look like they’ve seen better days. UV fabric sprays add an extra layer of defense, especially if your cushions are in full sun most of the day. It’s a small step that keeps them looking new all season.
How to Apply UV Protection Spray Correctly
For the best results, apply UV spray as part of your regular maintenance routine.
- Choose a spray designed specifically for outdoor fabrics. Avoid anything not labeled UV or weather-resistant.
- Clean and dry cushions before application. Never spray onto a dirty or damp surface.
- Hold the can about 6–8 inches away and apply evenly across the entire surface, including seams and backs.
- Let it dry completely before using the cushions again – usually, 24 hours is safe.
(5) Store Them When You’re Not Using Them
Leaving your cushions out 24/7, even if they’re labeled "outdoor-safe", shortens their lifespan. Rain, dew, humidity, and even early morning fog all contribute to mold and moisture buildup. Storing them properly when not in use, especially over night or during storms, is one of the smartest habits you can form.
Tips for Safe and Easy Cushion Storage
You don’t need a fancy shed – just a little planning goes a long way.
- Use a waterproof deck box or weatherproof storage bin to keep cushions protected and dry.
- If you don’t have covered storage, heavy-duty cushion storage bags are great for small patios or balconies.
- Make sure the storage area is well ventilated to prevent trapped humidity.
- If you’re storing for more than a few days, make sure cushions are clean and fully dry first to avoid mold.
(6) Rotate Your Cushions Weekly

Just like rotating tires or flipping a mattress, turning your cushions keeps wear and sun exposure even. You might not notice it at first, but sitting in the same spot every day compresses the filling unevenly and fades one side faster. A simple weekly rotation helps them last longer and keeps your seating feeling balanced and looking uniform.
How to Rotate Cushions for Even Wear
It’s as easy as making it part of your weekly routine.
- Flip each cushion front to back and top to bottom to balance pressure points.
- Rotate the seat and back cushions with each other if they’re the same size.
- If one side gets more sun than the other, make sure to swap sides every few days.
- Doing this weekly helps prevent sagging, misshaping, and discoloration.
(7) Deodorize Naturally with Baking Soda
Hot, humid weather plus sweat, food, and pet fur can make patio cushions smell stale fast. Instead of masking it with air fresheners or perfumes, tackle the source using natural deodorizing methods. Baking soda is a simple, effective, and affordable solution that doesn’t harm fabric or people.
Steps for Freshening Up Cushions with Baking Soda
You only need a vacuum cleaner and some baking soda to get the job done.
- Sprinkle a generous layer of baking soda over the cushion surface.
- Let it sit for at least 30 minutes, or leave it on longer for stronger odors.
- Vacuum the cushion thoroughly using a brush or upholstery attachment.
- For added freshness, follow up with a light mist of water and white vinegar, then let it dry in the sun.
Schedule Your Patio Cushion Refresh with Sage Cleaners!
Your outdoor setup should be as bright and inviting as the summer sun, and that starts with fresh, clean patio cushions. Get that timely summer refresh with Sage Cleaners, Tampa’s trusted name in patio cushion cleaning for over 30 years.
We’ll eliminate stains, odors, and allergens so your outdoor space feels just as clean and comfortable as your living room. Whether you're entertaining guests or enjoying a quiet moment outside, our expert team makes it simple to keep your cushions looking their best.
With convenient in-store drop-off or free home Pickup and Delivery Service, maintaining your outdoor furniture has never been easier. Refresh your outdoor living space with the care and quality only Sage Cleaners can provide.
Don’t wait for stains to settle in. Schedule your professional Patio Cushion Cleaning Service today and enjoy your patio in comfort all season long. Call Sage Cleaners at 813-543-8380.
When your wedding just recently happened, say a few days ago or even a couple of weeks back, it’s totally normal to still be catching your breath. You’ve laughed, cried happy tears, partied with your favorite people, and started your next chapter. And somewhere in the corner of your room, your wedding dress is still hanging there - wrinkled, maybe a little stained, but full of memories. So now you’re probably wondering: When’s the right time to get it cleaned? Is it urgent, or can it wait a bit?
Want to know how soon is too soon, or too late? This blog shares tips on when to clean your wedding dress and how timing impacts long-term preservation.
1 | Clean Your Dress ASAP (Within a Week)
The absolute best-case scenario for your wedding dress is to get it professionally cleaned within 5 to 7 days of the big day. Why? Because even if it looks clean, your gown has likely picked up body oils, invisible sweat stains, or makeup smudges you can’t see, yet. These sneak up on you weeks later as yellow spots or fabric discoloration, and at that point, they’re harder (sometimes impossible) to get out.
Here’s what to do if you’re staying local after your wedding:
Step 1: Don’t leave your dress in a garment bag or in the backseat of your car - hang it in a cool, dry place with good airflow.
Step 2: Call or email a trusted bridal gown cleaning expert and let them know you want to bring it in within the week.
Step 3: Gently transport your gown in a breathable cotton bag or wrapped in a clean white sheet, avoid plastic bags that trap moisture.
Step 4: Discuss any noticeable stains or problem areas with the cleaner (like wine spills, makeup marks, or sweat stains).
Step 5: Ask about preservation options at the same time, it’s easier (and often cheaper) when done right after cleaning.
2 | If You’re Leaving for a Honeymoon, Schedule Cleaning Before You Go
If you're hopping on a flight for a week or two of sun, beaches, and relaxation, your dress shouldn't just sit in a corner collecting dust, or worse, allowing stains to settle in. Scheduling your wedding gown cleaning before you leave takes one major post-wedding task off your plate and protects your gown from damage while you're gone.
Here’s how to make that happen without stress:
Step 1: Before your wedding day, research bridal dress dry cleaning services in your area (search terms like “wedding gown dry cleaning near me” help!).
Step 2: Book your cleaning appointment for the day after your wedding or the first available day before your trip.
Step 3: Ask if the cleaner offers pickup and delivery service - many do, and it's a game-changer when you're short on time.
Step 4: Ask someone you trust (a bridesmaid, mom, or maid of honor) to drop off the dress if you're traveling early the next morning.
Step 5: Provide clear instructions on where the gown is stored and mention any stains you know about, like champagne or lipstick.
3 | Emergency Cleaning: If You Had Outdoor or Messy Reception Events
Outdoor weddings are magical, but they can be tough on your dress. If your gown saw grass stains, sand, dirt, food spills, or a dance floor full of spilled drinks, you need to act fast. These types of stains are more aggressive and can eat away at fabric or discolor lace and silk within days.
Here’s how to handle it right:
Step 1: Don’t try to scrub or wipe the stain at home, it can make things worse. Leave it to a professional.
Step 2: Air out your dress immediately after the event. Hang it in a room with low humidity and no direct sunlight.
Step 3: Call a bridal dry cleaning service and let them know it’s an emergency situation. Some offer rush services or next-day treatment for special cases.
Step 4: When dropping it off, be specific about what got on the dress (wine, grass, chocolate cake) this helps the cleaner choose the right method.
Step 5: Ask if your cleaner offers spot-treating with textile-safe solvents to preserve beading and delicate lace.
4 | If You Missed the Ideal Window, Get It Done Within a Month
Maybe you got caught up in post-wedding bliss, travel plans, or just needed a break from planning. That’s okay, all is not lost. If it’s been a few weeks, you can still protect your gown from long-term damage, but you should act now.
Why is a one-month deadline important? After 30 days, oxidation can start to change the color and chemistry of hidden stains. That’s when things start to yellow or darken.
Follow these steps if you’re a little late:
Step 1: Inspect your gown for visible or hidden stains (check under the hemline, underarms, bodice lining).
Step 2: Call a specialist in wedding gown cleaning near me who has experience with delayed cleaning cases.
Step 3: Be honest about how long it’s been and what might be on the gown, they may use a different cleaning approach.
Step 4: Ask about restoration options, especially if yellowing has started, they may use textile-safe oxidation reversal treatments.
Step 5: If preservation is still your goal, pair cleaning with acid-free box packaging and garment protection.
Better late than never, but don’t wait any longer - this is your last window before things become much harder (and more expensive) to fix.
5 | If You Plan to Preserve It, Clean Before Storing
Want to keep your dress as a keepsake? Maybe pass it down one day or simply hold onto it for the memories? Then, preservation is key, and it starts with proper cleaning. Storing a dirty dress, even if it doesn’t look stained, will guarantee long-term damage. Oils, sweat, and dirt eat through fabric over time, especially in delicate textiles like silk or tulle.
Follow these steps:
Step 1: After the wedding, bring your gown to a bridal gown cleaning service that also offers preservation.
Step 2: Ask for museum-quality or acid-free packaging, which includes a special box and tissue paper that keeps your dress from yellowing.
Step 3: Make sure the dress is fully dry and free of all residue before it’s boxed, any leftover moisture leads to mildew.
Step 4: Store your dress in a cool, dark, and dry place (no attics or basements).
Step 5: Don’t forget about your veil or accessories, they should be cleaned and preserved the same way to prevent discoloration.
Still Waiting to Clean Your Dress? Now’s the Time - Call Sage Cleaners Today!

Don’t wait around to get your dress cleaned after your wedding. You might be surprised by hidden stains that surface over time, turning into permanent discoloration.At Sage Cleaners, we can help stop that damage before it sets in.
Our wedding dress cleaning process is far more than placing your gown in a fancy box. We know every dress is different, which is why we tailor our approach to your gown’s specific fabrics, embellishments, and needs. We use a custom blend of dry cleaning and wet cleaning techniques along with environmentally friendly cleaning agents that brighten your gown, prevent fading, and restore it to better-than-new condition.
To learn more about our Wedding Dress Cleaning and Preservation Services or to schedule a cleaning or restoration appointment, please reach out to our experts at the Sage Cleaners location nearest to you. If you’re in Tampa, call 813-669-5409 to get started.
Ask any man who always looks sharp, and you’ll find that the secret isn’t what he buys — it’s how it fits. And yet, most men overlook alterations completely, assuming they’re only for formalwear or major changes. In truth, even slight alterations can make a noticeable impact.
A subtle taper on your pants can modernize your silhouette. A shortened sleeve can instantly make a shirt look custom-fitted. A nip at the waist of your blazer can redefine your entire posture. And when clothes fit well, they make you feel good, too. You stand straighter, move better, and show up with more presence.
In this article, we walk you through seven underrated alterations and show you exactly how they transform your outfits from average to impressive.
1) Tapering the Jacket for a Stronger, Sharper Silhouette
Jackets that hang straight down from the shoulders tend to look bulky and outdated. A simple taper at the waist gives your blazer or suit jacket structure and definition. It’s the difference between looking like you borrowed your dad’s coat and one that looks made for you.
Most off-the-rack jackets can be tapered easily by a skilled tailor. This small adjustment makes your midsection look slimmer and your shoulders more pronounced.
How Jacket Tapering Works
Once you take your jacket to a tailor, here’s what to expect:
- Your side seams will be adjusted. The tailor will pin the sides of your jacket inward from under the armpit to the hem.
- Your posture and proportions are considered. A good tailor won’t overdo it; they’ll follow your natural shape to keep it comfortable.
- It’s usually a mid-tier alteration. Expect to pay more than you would for hemming pants, but far less than a custom jacket.
Take note: This alteration works best when you’re standing and moving naturally during the fitting, so the final shape flatters your everyday stance.
2) Shortening the Shirt Sleeves for a Cleaner, Smarter Fit
Shirt sleeves that cover your hands or bunch under a jacket sleeve make the entire outfit feel off. This is especially noticeable when wearing dress shirts with suits. Ideally, your shirt sleeve should stop right at the wrist bone so it peeks out beneath your jacket. A tailor can trim excess length without affecting the cuff design. It’s one of the easiest ways to refine your look.
Things to Know Before Shortening Shirt Sleeves
Here’s how the process works and what you should check:
- The alteration is done at the cuff or shoulder. Most tailors prefer to shorten from the cuff unless the shirt has special design features.
- Check for placket and button spacing. Some shirts can’t be shortened too much without disrupting the button layout.
- Bring the jacket you’ll wear with it. This helps your tailor match the sleeve break perfectly when worn together.
Take note: This is a basic but high-impact fix that helps your arms look more proportionate and ensures a neater presentation.
3) Hemming Pants to the Perfect Break
Long pants that bunch up at the ankle create a “puddle” of fabric that instantly drags down your entire outfit. Hemming pants to the right length cleans up your profile and elongates your frame. It also highlights your shoes, which is especially important for formalwear or weddings. Tailors can shorten pants to your ideal “break” preference — full, half, quarter, or no break at all.
How to Choose the Right Pant Break
If you’re not sure how short to go, here’s a guide to get started:
- No break: The pants just kiss the top of your shoes, sleek and modern.
- Quarter break: Slight dent at the ankle, balanced and versatile.
- Half break: Slightly more fabric for a classic, relaxed feel.
- Full break: Significant bend in the fabric – more traditional, best with wide-leg trousers.
Take note: Bring your most worn dress shoes to your appointment so the tailor can match the hem precisely.
4) Taking in the Waistband for a Tailored Fit Around the Hips

If your pants fit in the legs but are loose at the waist, you likely need to take in the waistband. This is especially common if your body shape has changed or if you bought pants one size up for comfort.
But a sagging waistband makes everything else look sloppy, no matter how nice the fabric. A properly fitted waist helps the trousers sit where they should and removes the need to constantly adjust your belt.
The Tailor’s Process for Waist Adjustments
Here’s how tailors fix this issue without affecting the rest of the fit:
- They open the waistband at the back center seam. This lets them remove excess fabric while keeping balance across the hips.
- The alteration may also affect the seat. If needed, the tailor will taper the seat area for a smooth drape.
- Ideal for dress pants and denim. Just make sure your pants have enough seam allowance.
Take note: This is a practical alteration that makes a huge difference in comfort and overall silhouette.
5) Slimming the Shirt Body for a Fitted, Athletic Look
A lot of men wear shirts that balloon out at the sides. This isn’t always noticeable when standing still, but once you move, sit, or tuck in your shirt, it shows. Slimming the sides of your shirt (also called “darting”) pulls the fabric closer to your torso for a cleaner fit. It's especially helpful for men with athletic builds or anyone trying to avoid that boxy look.
What Happens When You Slim a Shirt
A good tailor can reshape the body of your shirt with precision:
- Darts or side seam adjustments are added. Darts are vertical seams sewn into the back of the shirt to reduce volume.
- They preserve your armhole space. You’ll still be able to move comfortably without pulling at the sides.
- Best for dress shirts and button-downs. Casual flannels or stretch fabrics may not need this unless very oversized.
Take note: Slimming a shirt not only improves the fit but also enhances layering, which is great under jackets or sweaters.
6) Shortening the Jacket or Blazer Sleeves for Proportion
Your jacket sleeves should stop just before your wrist to reveal a hint of shirt cuff. Anything longer throws off the entire proportion of your suit. This is especially important for formalwear like tuxedos or tailored blazers. Even casual sport coats benefit from this adjustment.
What to Expect When Adjusting Jacket Sleeves
This is a standard jacket alteration, but there are key things to watch for:
- Tailors shorten from the cuff if there's no buttonhole. Otherwise, it gets more complex (and expensive).
- If working near functional buttonholes, shortening may need to happen at the shoulder. This is more advanced and should only be done by an experienced tailor.
- You’ll be measured while standing naturally. This helps the tailor calculate sleeve length during wear, not just while posed.
Take note: Even just a half-inch difference can completely change how polished your outfit looks.
7) Refining the Shoulder Fit
A poorly fitted shoulder makes a jacket look borrowed, regardless of how nice the fabric. Shoulder alterations are the most complex on this list and aren’t always worth it for off-the-rack garments. But for investment pieces (e.g., a wedding tux, leather jacket, or a designer blazer), they’re sometimes necessary to achieve the perfect frame.
What Goes Into Shoulder Adjustments
Here’s what makes this a high-skill alteration:
- The jacket must be deconstructed. The tailor removes the sleeve and reshapes the shoulder pad and seam line.
- It’s time-intensive and expensive. This fix requires experience and is best left to tailoring specialists.
- Only attempt this with high-quality garments. It’s not usually worth it for fast fashion or discount items.
Take note: If the jacket is worth saving and everything else fits well, shoulder refinement can be the final step to a flawless look.
Visit Sage Cleaners for the Best Men’s Alterations in the Tampa Bay Area!
If you're after alterations that truly understand fit, comfort, and style, Sage Cleaners is the place to trust with your best pieces. Our expert tailors are skilled in all garment types, from denim to delicate gowns, and we pride ourselves on the quality results we deliver. Whether you're fine-tuning a new suit or reviving an old favorite, we’re here to make sure every stitch reflects your style.
Best of all, you can stop by one of our Tampa Bay store locations or take advantage of our convenient home or office FREE Pickup and Delivery Service, and it only takes a few minutes to sign up. Call us today at 813-543-8380 or visit one of our locations here in the Tampa Bay Area!
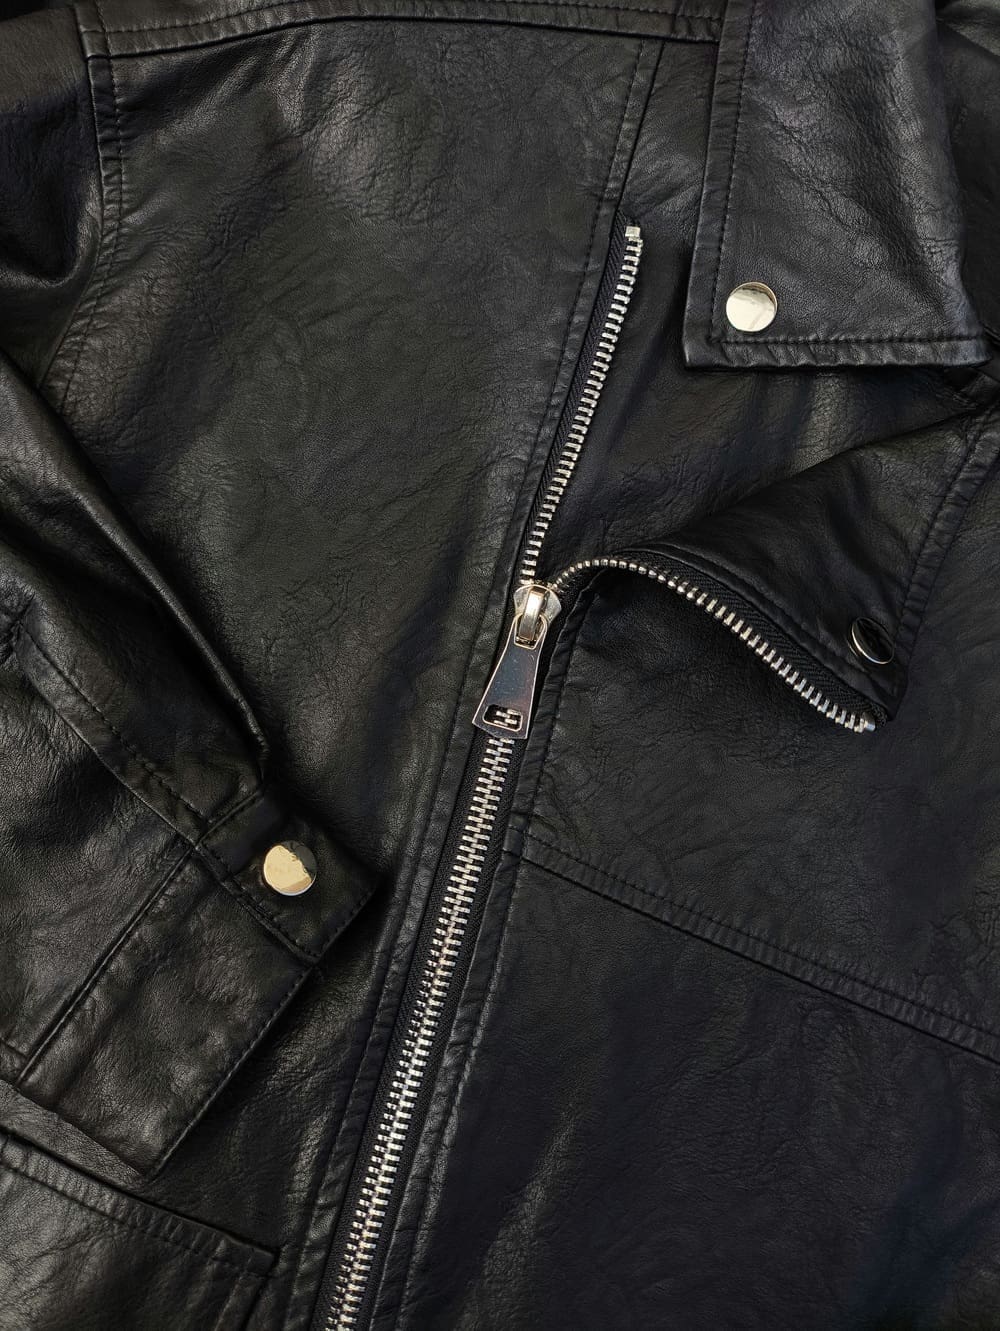
A leather jacket is a statement piece that adds instant edge and personality to the person wearing it. Just think of those iconic Matrix movies where Keanu Reeves made that long black coat look effortlessly cool – timeless, bold, and impossible to ignore.
Whether yours is a buttery-soft bomber, a vintage moto jacket, or a structured designer piece, it’s a true investment. And if you’re like most people, you love how it looks but are completely unsure of the right way to care for it.
As such, before you reach for a cleaner or take a damp cloth to it, there are a few things you absolutely need to know, because with leather, one wrong cleaning can be an expensive mistake. Keep reading to learn how to care for your jacket the right way and avoid the damage that so many well-meaning owners accidentally cause.
Why Leather is a Delicate Material
Leather is a treated animal hide that has been processed to be durable, flexible, and stylish. But underneath all that polish, it’s still porous and organic, which means it can dry out, stain, or warp if exposed to the wrong conditions. That’s why caring for leather is more about maintenance and caution than deep cleaning. You need to understand what you’re working with to preserve its look and feel.
Here’s what makes leather care such a specific (and often misunderstood) process:
- Leather is porous. That means it can absorb water, oil, and solvents easily. These can change the texture, cause stiffening, or discolor the surface.
- It contains natural oils. These oils keep the material soft and supple. If stripped away, whether by soap, heat, or alcohol, the leather can dry out and crack.
- It's not meant for water-based cleaning. Water can leave behind tide lines, rings, or even shrink the leather in some cases.
- It reacts to heat. Never put leather near a heater or in a dryer. High heat causes irreversible shrinking and warping.
- Different finishes need different care. Suede, nubuck, full-grain, and patent leather all respond differently to moisture and cleaners, so one-size-fits-all methods don’t apply.
Understanding these basics will help you avoid irreversible mistakes and keep your jacket in solid shape for years.
How to Clean a Leather Jacket the Right Way Without Wrecking It
Cleaning a leather jacket is all about gentle upkeep, using the right products, and knowing when to stop. Your goal isn’t to "clean" it the way you’d scrub a pair of trousers, it’s to refresh it without stripping away the finish or drying out the hide. Proper maintenance is 90% prevention and 10% strategic action.
Here’s a beginner-friendly way to do it right:
Step 1: Check the care label
Look for any specific instructions. Some jackets have treated finishes that allow for a little more flexibility, while others (like suede or unfinished leather) are extremely sensitive.
Step 2: Wipe with a dry microfiber cloth
Start by removing surface dust or dirt. Avoid rough towels, as they can scratch the leather.
Step 3: Use a leather-specific cleaner
Never use dish soap, laundry detergent, or all-purpose household cleaners. Choose a cleaner made for leather garments, ideally pH-balanced and solvent-free.
Step 4: Spot test first
Always test any product on an inside seam or hidden area before applying it to visible parts of the jacket.
Step 5: Apply gently
Dampen a soft cloth with the cleaner and lightly rub the surface in circular motions. Don't saturate the leather, it’s not supposed to be wet.
Step 6: Let it dry naturally
Hang the jacket in a well-ventilated room, away from sunlight and heat. Never use a blow dryer or put it near a radiator.
Step 7: Condition regularly
After cleaning, use a leather conditioner to rehydrate the material. This helps prevent cracking, fading, and stiffness.
Pro Tip: If you’re dealing with stains, watermarks, or heavy soil buildup, don’t attempt to clean it yourself. Bring it to a professional dry cleaner who also specializes in leather, because not all dry cleaning businesses are equipped to handle leather correctly. Ask them about the solvents they use and whether their services are environmentally friendly.
Avoid These Leather Cleaning Mistakes
Most damage to leather jackets happens because someone was trying to “fix” something without knowing what they were doing. DIY hacks, aggressive cleaning, and the wrong products are the top culprits.
- Don’t use water-based cleaning methods. Water doesn’t just stain leather, it can pull oils out of the hide, causing brittleness. You’ll often end up with a stiffer texture and visible blotches.
- Don’t use alcohol, bleach, or ammonia. These harsh chemicals can strip dye, discolor the material, and degrade the finish. They’re meant for surfaces like plastic or glass, not textiles like leather.
- Don’t toss your jacket in the washer. This sounds obvious, but it still happens. Leather shrinks and warps in water, and washing machines are too rough, even on a gentle cycle.
- Don’t skip the conditioning step. Every time you clean leather, you remove a little of its natural moisture. Skipping conditioner is like washing your hair without using any product afterward, it dries out fast.
- Don’t store leather improperly. After cleaning, don’t hang your jacket in a cramped closet or under direct sunlight. Use a wide, padded hanger and keep it in a breathable garment bag.
- Don’t wait too long to address stains. The longer a stain sits, the harder it becomes to treat. Especially with grease, wine, or ink, these can permanently embed in the hide.
Quality customer service should be able to walk you through their exact process.
Luxury Materials Call for Expert Care – Call Sage Cleaners for Premium Leather Cleaning!
As with all natural materials, leather benefits from professional treatment before you wear it and throughout its life to keep it looking rich, supple, and well cared for. At Sage Cleaners, we specialize in restoring leather, suede, and fur garments to their original condition using our proprietary cleaning process.
Our experts have cleaned and processed thousands of high-end items over the years, so even if you think your piece is beyond repair, there’s a good chance we can restore it to its former glory with our careful combination of oils, cleaning, and conditioning.
And yes, we can even fix tears! While the repair will be visible, our team carefully reinforces the damage from the inside and color-matches the area for the best possible result.
Call us today for more information or to schedule your leather cleaning service!