
What You’ll Pay for Laundry Service in Florida: A Clear Cost Guide
The first number most people see when researching Wash and Fold Laundry Service in Florida is a per-pound rate. It looks simple, but it isn't, because per-pound is just the starting point, and what you actually pay depends on factors most pricing pages don't explain up front.
This guide does. Here's how Wash and Fold Laundry Service is priced across the Florida market, what realistic weekly and monthly costs look like for different household sizes, and what moves your total up or down beyond that initial number.
Table of Contents
- How Laundry Service Pricing Works in Florida
- Laundry Service Cost for Singles and Couples in Florida
- Laundry Service Cost for Florida Families With Children
- What Affects Your Total Beyond the Per-Pound Rate
How Laundry Service Pricing Works in Florida
Per-Pound Pricing: What It Covers
Most laundry services in the Tampa Bay market charge by the pound. Wash and fold rates in this area typically run $1.75 to $2.50 per pound. That rate includes:
- Sorting your items before washing
- Washing in customer-specific loads – your clothes and home essentials stay separate from everyone else's
- Drying and folding
What the per-pound rate usually doesn't cover: pickup and delivery, oversized items such as comforters, or anything requiring dry cleaning. Those are priced separately, and we'll get to them.
At $2.49 per pound, the rate Sage Cleaners charges for pay-as-you-go service, a 10-pound bag runs $24.90. That's the number to keep in mind as you work through each household tier.
Subscription vs. Pay-Per-Use: Which Model Fits Your Household
Some providers offer flat-rate monthly plans, which work well when your laundry volume is consistent week to week. Sage Cleaners offers tiered subscription options that bundle regular pickup, delivery, and added services like linen care and hang-dry handling, so the more your household uses, the more you get covered under one predictable monthly cost.
Pay-per-use tends to work better when your schedule is irregular, or when Florida summers throw in extra volume from pool days, beach trips, and children going through three outfits before noon. If your laundry load swings significantly between seasons, a flat-rate plan may end up costing you more than it saves. For households with steady, high volume, though, a subscription typically pays for itself quickly.
Laundry Service Cost for Singles and Couples in Florida
What You’ll Spend Per Week and Per Month
Florida’s heat and humidity push laundry volume higher than national averages; expect 10% to 20% more frequent clothing changes than someone in a cooler climate. Here’s how the numbers look at $1.75/pound:
- Single adult: 8 to 14 lbs. per week | $14 to $24.50 per week | $56 to $98 per month
- Couple: 16 to 24 lbs. per week | $28 to $42 per week | $112 to $168 per month
Budget toward the higher end if either person works outdoors, exercises daily, or both. Active households in Florida consistently hit that upper range.
Does the Math Actually Favor a Laundry Service at This Household Size?
For a Riverview renter without each household tier, the honest laundromat comparison looks like this:
- Cost per laundromat visit: $4 to $6 per load in coins
- Time per visit: 90 to 120 minutes door to door
- Two visits per week: $16 to $24 per week in coin costs alone, plus 12 to 16 hours of your time each month
A laundry service at $56 to $98 per month isn’t dramatically cheaper in dollars. But if you already make that trip twice a week, you spend nearly the same amount of money and lose half a workday every month at the laundromat. The financial case alone isn’t overwhelming. The time case is harder to argue against.
Laundry Service Cost for Florida Families With Children
How Laundry Volume Adds Up in Florida’s Warm, Active Climate
This is the household tier where the numbers really shift. A Florida family of three to five generates 25 to 40 or more pounds of laundry per week during normal months. Add summer, swimwear, beach towels, sports gear, multiple clothing changes for children, and that number climbs fast.
At $1.75/pound, here’s what different weekly volumes cost:
- 25 lbs. per week: $43.75 per week | $175 per month
- 30 lbs. per week: $52.50 per week | $210 per month
- 40 lbs. per week: $70 per week | $280 per month
Families are also the most likely to fall behind. Miss one week and you face two weeks of laundry the next. A service removes that backlog entirely. Your pickup schedule keeps things moving, whether or not you have time for laundry.
The Real Trade-Off: Your Money vs. Your Time
Here’s the math for a family running 30 pounds per week, laid out plainly:
- Doing laundry at home (utilities + supplies): roughly $35 to $45 per month
- Laundry service at 30 lbs. per week: roughly $210 per month
- Monthly difference: roughly $165
- Time recovered: 20 to 30 hours per month
What does that $165 buy back? At home, a 30-pound weekly load typically takes five to eight hours to sort, load, switch loads, fold, and put everything away. That’s 20 to 30 hours per month. At $165 to reclaim 25 hours, you pay about $6.60 per hour for someone else to do the work.
What Affects Your Total Beyond the Per-Pound Rate
Pickup and Delivery Fees: Ask Before You Compare
This is the most common source of billing surprises for first-time customers. Some Florida laundry services include free pickup and delivery. Others charge $6 to $15 per round trip. For a family using pickup twice a week, that adds $48 to $120 per month, none of which shows up in the per-pound rate.
A service at $1.50/pound with $12 per-trip delivery fees can end up costing more than a $2.00/pound service that builds in delivery. Before comparing providers on price, ask one question: “What’s the all-in weekly cost at my volume?” The answer tells you far more than the per-pound rate alone.
Oversized Items and Specialty Pieces
King comforters, down duvets, heavily soiled work clothing, and dry-clean-only garments are typically priced outside the standard per-pound rate. This is industry-standard practice, not a bait-and-switch.
Knowing to ask up front is what prevents the invoice surprise. Before your first pickup or drop-off, just ask: “Do you charge separately for oversized or specialty items?” Any reputable provider will give you a straight answer.
Florida Wash and Fold Laundry Service Cost: Quick Reference by Household Size
| Household | Weekly Volume | Weekly Cost | Monthly Cost |
|---|---|---|---|
| Single adult | 8 to 14 lbs. | $14 to $24.50 | $56 to $98 |
| Couple | 16 to 24 lbs. | $28 to $42 | $112 to $168 |
| Family of 3 to 5 | 25 to 40 or more lbs. | $44 to $70 | $175 to $280 |
All estimates based on $1.75/lb (Tampa Bay market midpoint). Add $48 to $120 per month if pickup and delivery is billed separately.
Discover Smarter Laundry Solutions for Florida Living at Sage Cleaners
Schedule your first FREE Pickup and Delivery Service with Sage Cleaners today and experience eco-friendly cleaning, fast turnaround times, and convenient delivery with 33% off your first order using code NEW33.
Contact Sage Cleaners today, or schedule your Wash and Fold Laundry Service online.
📍 Sage Cleaners – Tampa Bay Area
🚚 FREE Pickup and Delivery Service Available Throughout Tampa Bay
📱 Call or Text: (813) 819-6658
Children are naturally active, always brimming with energy. So while school might be a place to learn, for them, it often doubles as a playground—where recess kicks up grass stains, lunchtime spills leave mysterious spots, and after-school sports add a whole new level of grime. By the end of the week, those crisp uniforms can start to look like they’ve been through a marathon, and the last thing you want is a frantic Sunday night spent trying to clean them before Monday rolls around.
But with the right laundry routine, you can stay ahead of the mess and make sure your child always has a fresh, neatly pressed uniform ready to go. If you haven’t set up a laundry routine, don’t worry—this guide helps you create a simple, efficient system to keep your children’s uniforms fresh all week.
How Many Uniforms Should You Have in Rotation?
Ever found yourself scrambling to wash a stained uniform the night before school? Or worse, realizing there’s nothing clean to wear in the morning? Having the right number of uniforms in rotation can make life easier and prevent those last-minute laundry emergencies. But how many do you really need?
The ideal number of uniforms depends on your child’s school schedule, your laundry routine, and how often you want to do laundry. Let’s break it down so you can find the right balance.
The Bare Minimum: 2–3 Uniform Sets
If you do laundry frequently, having two or three full uniform sets may be enough. This setup works best if:
- You wash midweek and don’t mind keeping up with a regular laundry cycle.
- Your child’s school uniform doesn’t get excessively dirty each day.
- You have backup clothing options, like a school-approved sweater or additional accessories.
However, this approach leaves little room for unexpected messes, busy schedules, or laundry delays.
The Recommended Number: 4–5 Uniform Sets
Most parents find that having four to five complete uniforms strikes the perfect balance between convenience and practicality. This allows you to:
- Do laundry once or twice a week instead of daily.
- Have a clean uniform ready every day, with extras for surprise spills or accidents.
- Reduce fabric wear and tear since each set gets more time to rest between wears.
This is a great choice for families who prefer a less stressful, more organized approach to school laundry.
The Ideal Setup for Busy Families: 6+ Uniform Sets
If your schedule is packed and laundry day doesn’t always happen on time, having six or more sets might be worth it. This option is best if:
- You prefer doing laundry only once a week or less.
- Your child comes home with heavy stains from sports, art class, or recess.
- You want extra flexibility for unexpected spills, weather changes, or last-minute school events.
While this requires a larger upfront investment, having a full week’s worth of uniforms can be a huge timesaver.
What About Partial Uniform Pieces?
Sometimes, you don’t need full sets of uniforms but extra key pieces instead:
- 3–4 extra shirts (since tops get dirty faster than pants or skirts).
- 2–3 pairs of pants or skirts (since bottoms can usually be worn more than once).
- 1–2 sweaters or blazers (for layering in colder months).
This approach helps cut down on laundry loads while still keeping enough options in rotation.
The Ultimate Weekly Laundry Schedule for School Uniforms
The best schedule depends on how many uniforms you have in rotation and how often you can realistically do laundry. Below is a simple, easy-to-follow weekly laundry plan that works for most families.
| Day | Laundry Task | Why It Works |
|---|---|---|
| Sunday | Full uniform wash – Wash all uniforms before the school week starts. Check for stains and pretreat if necessary. | Ensures a fresh start to the week so uniforms are clean, pressed, and ready for Monday morning. |
| Monday | Light refresh if needed – Spot clean any spills from the first school day. Hang or air out uniforms to keep them fresh. | Prevents unnecessary washing while keeping uniforms odor free and wrinkle free. |
| Tuesday | Midweek wash (if necessary) – If your child has limited uniforms, wash shirts or socks that are heavily used. | Keeps uniforms rotating smoothly if you don’t have a full set for every day. |
| Wednesday | Check for wear and tear – Inspect uniforms for small rips, loose buttons, or stains. Pretreat any stains immediately. | Catching issues early prevents last-minute wardrobe malfunctions. |
| Thursday | Quick refresh – Steam or lightly iron uniforms if needed. Do a small load if your child is running low on clean items. | Helps maintain a polished look without unnecessary washing. |
| Friday | Final wash of the week – Wash gym clothes, sweaters, and any extra pieces that need cleaning before the weekend. | Prepares everything for a stress-free weekend and next school week. |
| Saturday | Restock and organize – Fold and sort uniforms for the week ahead. | Saves time on busy mornings by keeping uniforms ready to grab and go. |
Other Helpful Tips for Staying Ahead of Uniform Laundry
- Have a dedicated laundry basket for uniforms – This keeps them separate from other clothes and makes sorting easier.
- Use a stain treatment routine – Teach your child to spot treat spills before tossing uniforms into the hamper.
- Invest in quick-refresh tools – A handheld steamer or fabric refresher spray can help uniforms last longer between washes.
- Check care labels – Some uniforms hold up better with air drying instead of machine drying to prevent shrinkage or fading.
Guidelines for Washing Uniforms Daily vs. Weekly
When to Wash Uniforms Daily
If your child only has a couple of uniform sets or tends to come home with stains, sweat, or strong odors, washing their uniforms daily may be the best approach.
Daily washing is ideal if:
- Your child has two or three uniform sets and wears the same pieces multiple times a week.
- They participate in sports, recess, or outdoor activities that leave uniforms dirty or sweaty.
- You want to prevent stains from setting—the longer stains sit, the harder they are to remove.
- You have a high-efficiency washing machine that can handle quick, small loads without wasting water or energy.
How to Wash Uniforms Daily Without Damaging Them:
- Use a mild detergent that’s tough on stains but gentle on fabric. Harsh formulas can fade colors and weaken fibers over time.
- Skip the fabric softener for synthetic-blend uniforms—it can create buildup and make fabrics less breathable.
- Air dry when possible instead of using a high-heat cycle in the washing machine. Frequent heat exposure can cause shrinkage.
- Pretreat stains immediately to avoid deep-set discoloration—especially for white shirts.
When to Wash Uniforms Weekly
If you have enough uniform sets to last through the school week, a weekly laundry routine may be more convenient. This method works well for families who prefer to do laundry in bulk, especially if they use a laundromat or shared washer and dryer.
Weekly washing is best if:
- You own four or more uniform sets, so your child always has a clean set available.
- Your child’s uniforms don’t get heavily soiled—some children come home with barely any stains or odors.
- You prefer to consolidate laundry into one efficient load rather than running smaller loads daily.
- You rely on a laundromat and want to cut down on trips and laundry costs.
Best Practices for Washing Uniforms Weekly:
- Sort uniforms separately from other laundry loads to prevent lint transfer and color fading.
- Choose a high quality detergent that removes stains even after they’ve set for a few days.
- Use cold water and a gentle cycle to maintain fabric integrity and prevent premature wear.
- Steam or lightly iron uniforms midweek to keep them looking crisp between washes.
Never Worry About Dirty Uniforms Again—Schedule a Professional Laundry Service with Sage Cleaners!

Although it’s natural for children to be clumsy and get their uniforms stained and messy, keeping them fresh and spotless doesn’t have to be a daily struggle. Instead of spending hours scrubbing out stains or running last-minute wash cycles, let Sage Cleaners handle it for you!
We offer premium dry cleaning and laundry services in Tampa, and for a limited time, you’ll receive 20% off your first order—just for giving us a try! Our team picks up and delivers right from your doorstep, so you can skip the hassle and focus on more important things.
Here’s how it works:
- Schedule a FREE pickup—A Sage Cleaners driver arrives within your designated time window.
- We professionally clean your clothing—Uniforms, school outfits, and all your family’s laundry receive the expert care they deserve.
- Fresh, neatly pressed clothes delivered back to you—In 48 hours, your clothing arrives in a reusable Sage Cleaners garment bag—ready for the week ahead.
Sage Cleaners is in your area every week! No start-up fees, no minimum spending, just clean clothes without the hassle.
Visit Us:📍 3312 Lithia Pinecrest Road, Valrico, FL 33596
Call: 📞 (813) 819-6658
Email: ✉️ care@sagecleaners.com
While laundry is a universal chore, every family—let alone every individual—has different needs and routines. Some families wash clothes only when the hamper’s overflowing, while others have a strict “Laundry Day” each week. Whatever your current routine (or lack thereof), creating a simple, effective laundry schedule can help you find a rhythm that fits your household.
In this guide, we cover everything you need to create an effective laundry routine for every family size, answer some common questions, and offer practical tips for staying organized.
Why Create a Weekly Laundry Schedule
Even just looking at those overflowing laundry baskets can feel so unmotivating. This is why creating a simple, consistent laundry schedule can turn this endless task into something you can handle each week without feeling overwhelmed.
Here’s why making a weekly laundry schedule is more of a must than a “maybe.”
1. To Avoid Feeling Overwhelmed and Save Time
Nothing kills motivation like seeing shirts, socks, jeans, and towels scattered around. When you wait until laundry piles up, it turns into an all day job that leaves you feeling drained. A weekly schedule keeps things manageable, giving you a set time to tackle smaller, regular loads. This approach helps prevent the overwhelming feeling of large, time-consuming laundry sessions.
2. To Preserve the Quality of Your Clothes
Frequent loads make it easier to properly care for your clothes, especially those delicate items that require a bit more attention. When laundry gets delayed, items sit with stains, sweat, or dirt, which can be harder to remove and can lead to long-term wear and tear on fabrics. Sticking to a weekly schedule helps you spot-treat stains on time, avoid damage from sitting grime, and keep every dress or favorite shirt looking fresh and ready to wear.
3. To Help You Stay Prepared for the Week Ahead
There’s nothing worse than realizing you’re out of clean shirts or towels just when you need them. By sticking to a weekly schedule, you always have the essentials ready, whether it’s work clothes, gym gear, or children’s uniforms. A weekly schedule allows you to anticipate what you’ll need, giving you peace of mind that your household is always prepared for whatever comes up.
4. To Make Room for Other Priorities
By setting aside specific times for laundry, you make time for other things that matter. Whether it’s spending more time with family, focusing on a hobby, or simply enjoying some downtime, a laundry schedule gives you the peace of mind that this chore is handled and not competing with everything else on your plate.
5. To Support an Eco-friendly Routine
Believe it or not, a laundry schedule can also help reduce your environmental impact. When you do fewer, fuller loads rather than smaller, scattered loads, you save water, electricity, and detergent. This doesn’t just benefit the environment but also saves on utility bills. An eco-friendly routine can be as simple as scheduling a day to wash linens separately and using energy-saving settings on your washing machine and dryer.
The Best Laundry Schedule for Different Households
Small Households
A small household typically includes one to two people—such as a single professional, a couple, or even two roommates sharing space. Because there are fewer clothes to manage each week, these households can approach laundry with a bit more flexibility. Rather than needing several loads spread across multiple days, a small household often finds one or two laundry days are enough to keep things running smoothly.
How to Create a Weekly Laundry Schedule for Small Households
- Choose Your Laundry Day(s) – Decide on one or two days each week that work best with your schedule. For many people, the weekend or a day off from work is ideal, allowing time to wash, dry, fold, and put away clothes without rushing. If you prefer to do a little laundry more often, consider dividing loads into a midweek and weekend schedule.
- Sort Clothing items by Type and Urgency – Before diving in, sort items by categories like work clothes, gym wear, and household items like towels and bedding. This helps you prioritize essentials and keeps smaller, manageable loads. Doing this ensures you don’t run out of clean work shirts or bed linen when you need them.
- Combine Similar Items – Small households often don’t have enough laundry to justify separate loads for every color or fabric type. For general laundry needs, it’s okay to combine similar items, like cotton shirts and pants. Just be sure to follow fabric care instructions and separate delicates, which may need gentler care or even a special cycle on your washing machine.
- Incorporate Laundry into Your Routine – To avoid laundry day feeling like an endless task, try fitting it into your routine. Start a load while you make breakfast or take care of emails, and plan to fold clothes while catching up on a show or listening to a podcast. This way, laundry becomes just another part of the day instead of a time-consuming to-do.
Families with Small Children

A family with small children typically includes parents or caregivers with infants, toddlers, or young children who tend to create extra laundry. Children this age often go through multiple outfits a day due to spills, accidents, and general play. Plus, parents wash not only their children’s clothes but also items like bibs, blankets, and bedding, which require more frequent cleaning. With all this to manage, a well thought out laundry schedule is essential to stay on top of the laundry pile.
How to Create a Weekly Laundry Schedule for Families with Small Children
- Identify Your Laundry Priorities by Day – Start by breaking down laundry into categories like children’s clothes, bedding, towels, and adult clothing. Assign specific days to each category, prioritizing items that are in high demand, like children’s clothes and towels. For example, consider doing children’s laundry midweek and again on the weekend to keep up with their frequent outfit changes.
- Establish a Stain Treatment Routine – With children in the picture, stains are inevitable. Set up a routine for stain treatment by keeping a stain remover near the laundry basket or in the bathroom. Treat stains as soon as possible, then set aside those items for the next laundry day. This quick step saves clothes from permanent stains and reduces the time you spend scrubbing out tough spots.
- Utilize a Large-capacity Washing Machine – Families with small children benefit from a large-capacity washing machine, which lets you tackle more items in a single load. On designated laundry days, gather clothes from each family member’s hamper, then wash similar items together. Having a single load of children’s clothes or bedding cuts down on time and makes it easier to fold and put items away as soon as they’re finished.
- Make Folding a Family Activity – With children in the house, folding can actually be a fun activity. Encourage children to help by sorting socks, matching items, or even folding their own clothes, depending on their age. This not only keeps laundry from piling up but also helps children feel more involved in household routines, making laundry less of a chore and more of a family activity.
Households with Working Professionals
Households with working professionals typically include one or more individuals who spend most of their days in work attire, which often means business or business-casual clothing that requires extra care. These households also tend to include gym wear, casual clothing, and possibly delicate fabrics that may need dry cleaning. For working professionals, a laundry routine that aligns with their busy schedule is essential to stay organized, look sharp, and make sure they’re always ready for the next day.
How to Create a Weekly Laundry Schedule for Households with Working Professionals
- Choose Designated Laundry Days – Pick one or two days each week that work around your schedule. For example, many working professionals prefer to tackle laundry on weekends or evenings when work responsibilities are lighter. If you’re managing more frequent items like workout clothes, consider adding a midweek wash to keep things fresh. This approach helps you avoid laundry overload and keeps you focused on weekday priorities.
- Prioritize Work Clothes and Delicates First – Since work clothes often need to be ready for Monday, make them the priority. Separate business attire and delicate items that may require special care, such as a gentle cycle on your washing machine or dry cleaning. Keeping these items in a dedicated load ensures they get the proper care, helping to maintain their quality and extend their life.
- Incorporate Gym and Casual Wear as Secondary Loads – For professionals with active lifestyles, gym wear can accumulate quickly. Adding it to your laundry schedule on the weekend keeps your activewear fresh for the week ahead. Casual items can go in the same load as gym wear if they don’t require special care, saving you time and making laundry day more efficient.
- Take Advantage of Time Saving Tools – For busy professionals, a laundry mobile app or online scheduling tool can make laundry day less of a chore. In the Tampa Bay Area for instance, some dry cleaners even offer pickup and delivery services, so you don’t have to make a special trip. Look for nearby clothes cleaners to find convenient options that fit your schedule. These tools can help you manage larger loads or specialty items like suits or dresses without adding to your workload.
Enjoy Clean, Freshly Folded Laundry Every Week – Book a Laundry Pickup with Sage Cleaners!
Keeping a weekly laundry schedule allows you to take control of the laundry instead of letting it take control of you. At Sage Cleaners, we’re here to make that easier than ever with our reliable, professional wash and fold laundry service. Serving South Tampa and the greater Florida area for over 35 years, we take pride in offering exceptional customer service and unmatched care for your garments.
With our convenient dry cleaning and laundry app, you can schedule a pickup with a few taps. A Sage Cleaners driver will arrive at your doorstep, ready to collect your laundry, and our same-day service means you’ll have your clothes cleaned, folded, and returned to you in pristine condition within hours. Our wash and fold service is completed within one day (or even same-day, upon request!), giving you more time for what matters most.
Sign up with Sage Cleaners today to start using our range of professional garment care services!
When welcoming a new baby, new parents rarely anticipate the loads of laundry that come along with their bundle of joy. But because baby clothes are so delicate and tiny (think of those oh-so-cute onesies, soft blankets, and little hats – not to mention those milk stains, diaper leaks, and spit-ups), there’s a bit of a learning curve to tackling baby laundry.
So, how do you keep those tiny outfits clean, fresh, and safe for your little one? Mommies and daddies – don’t stress! All you have to remember are the do’s and don’ts of washing baby clothes. Enjoy reading!
When Choosing Laundry Detergent
The type of detergent you choose greatly impacts your baby’s comfort. With their delicate skin and tiny, sensitive bodies, using the wrong product could lead to skin irritation, rashes, or allergic reactions – things with which no parent wants to deal. But with an overwhelming number of options on the shelves in malls and grocery stores, how do you decide which one is the best?
DO’s
1. Opt for Hypoallergenic Detergents
Babies have sensitive skin, so always look for detergents labeled as “hypoallergenic.” These are formulated to minimize allergens and avoid common irritants like dyes and perfumes.
2. Go for Fragrance Free Options
While the smell of fresh laundry can be soothing, strong fragrances can irritate your baby’s skin. A fragrance free detergent ensures there are no added scents that might cause itching or rashes, making it a safe choice for your little one’s clothes, towels, and blankets.
3. Choose Gentle, Plant Based Formulas
If you want to be environmentally friendly and gentle on your baby’s skin, plant based detergents are a great option. They’re free from harsh chemicals, making them safer for your baby and kinder to the planet.
4. Test with a Small Load First
Before committing to a new detergent, wash a small load of baby clothes and monitor how your baby reacts. If you notice any signs of irritation, it’s time to try a different product.
DON’Ts
1. Avoid Strong Chemicals and Enzymes
While powerful cleaners with enzymes tackle tough stains, they can be too harsh on delicate baby textiles. These chemicals can lead to skin irritation and damage the softness of the fabric. Stick to gentle, non-bio options to preserve your baby’s clothes.
2. Skip the Brighteners and Whiteners
Brighteners, bleach, and other additives may make clothes look whiter, but they can be tough on baby skin. They’re often made from harsh chemicals that can linger on clothes after washing, so it’s best to avoid them.
3. Don’t Use Fabric Softeners in Place of a Gentle Detergent
Fabric softeners may make clothes feel softer, but they often leave a coating on the fabric that can irritate sensitive skin. They also reduce the absorbency of certain items like bibs and towels. Stick to a detergent specifically formulated for babies and avoid softeners altogether.
4. Avoid Products with Overwhelming Fragrance Claims
If the detergent bottle advertises “long-lasting fragrance” or “24-hour scent,” it’s best to steer clear. Such products often contain strong perfumes and chemicals that can irritate sensitive skin, so read the labels carefully.
When Treating Baby Clothes with Stains
Stains on baby clothes are pretty much a given – blankets dragging on the floor, baby food all over their sleeves, and the mess on the diaper changing pad. It might feel overwhelming when that favorite onesie gets splattered, but treating stains doesn’t have to be a headache. The key is knowing the proper steps to take (and which ones to avoid) to keep those baby clothes looking fresh and new.
DO’s
1. Act Quickly
Time is of the essence when it comes to stains. The sooner you address them, the better your chances of complete removal. As soon as you notice a stain, rinse the garment under cold water to prevent it from setting. Quick action can make all the difference.
2. Use Gentle, Baby Safe Stain Removers
Opt for stain removers that are free from harsh chemicals and safe for sensitive skin. There are products specifically designed for baby clothes that effectively remove stains without irritating your baby’s skin. Always read the labels to ensure they’re suitable for infants.
3. Pre-soak for Tough Stains
For stubborn stains like formula, poop, or food purees, consider pre-soaking the garment. Fill a basin with cold water and add a bit of your baby friendly detergent. Let the stained clothing soak for at least 30 minutes before washing. This helps loosen the stain and makes it easier to wash out.
4. Test Products on a Small Area First
Before applying any stain remover or detergent to the entire garment, test it on a small, inconspicuous area. This ensures the product won’t discolor the fabric or cause any damage.
5. Follow Care Instructions on Labels
Always check the care label on your baby’s clothes. Some delicate fabrics may require hand washing or specific temperatures. Adhering to these guidelines helps preserve the quality and longevity of the clothing.
DON’Ts
1. Don’t Use Hot Water Immediately
While hot water is great for sanitizing, it can actually set certain stains—like protein-based soil—making them harder to remove. Start with cold water to rinse out the stain before considering a warmer wash.
2. Avoid Harsh Chemicals and Bleach
Steer clear of bleach and strong chemical cleaners. These can irritate your baby’s sensitive skin and weaken the fabric fibers. Plus, residual chemicals can linger even after rinsing, which isn’t ideal for clothing that’s in direct contact with your baby’s skin.
3. Don’t Rub Too Hard
It might be tempting to scrub the stain, but aggressive rubbing can damage delicate baby fabrics and spread the stain further. Instead, gently blot the stain with a soft cloth or sponge in a dabbing motion.
4. Skip Fabric Softeners on Stained Clothes
Fabric softeners can create a coating on fabrics that locks in stains and makes them harder to remove. They can also reduce the absorbency of materials, which isn’t great for items like bibs or burp cloths.
5. Don’t Dry Before the Stain is Fully Gone
Avoid putting stained clothing in the dryer until you’re certain the stain is removed. The heat can set the stain permanently, making it nearly impossible to get out later. If the stain persists after washing, repeat the treatment before drying.
When Using Washers and Dryers
You might have the most high-tech washing machine in your laundry room, but without the proper approach, you could be doing a disservice to those adorable outfits. Even something as simple as mixing a heavy towel with your baby’s clothes can lead to unnecessary wear and tear. Let’s go over the dos and don’ts to ensure you’re getting the best results every wash.
DO’s
1. Choose a Gentle Cycle and Low Heat Settings
Baby clothes are typically made of softer, more delicate fabrics that benefit from a gentle wash. Opt for the delicate or gentle cycle on your washing machine, which reduces agitation and prevents damage to the fabric. When it comes to drying, use a low heat setting to avoid shrinking or wearing out those tiny outfits.
2. Use Mesh Laundry Bags for Tiny Items
Baby socks, mittens, and small hats can easily get lost in the wash. Placing these smaller items in a mesh laundry bag helps keep them together and makes it easier to transfer from the washer to the dryer without losing any little pieces along the way.
3. Regularly Clean the Lint Trap and Drum
A clean washing machine and dryer ensure residual detergents, fabric softeners, or lint don’t transfer onto your baby’s clothes. Wipe down the drum and clean the lint trap after each use to maintain a hygienic environment.
DON’Ts
1. Don’t Overload the Washing Machine
While it’s tempting to throw as much as you can into a single load, overloading the washing machine makes it harder for clothes to move around, which affects how well they’re cleaned. Plus, it can lead to extra friction and wear on delicate fabrics. Make sure you leave enough room for water to circulate properly through the garments.
2. Don’t Mix Baby Clothes with Heavy, Rough Items
Keep baby clothes away from heavier laundry like jeans, bath towels, or large blankets. The rougher texture and weight of these items can cause friction against delicate baby garments, leading to pilling, wear, and even tears. It’s best to wash baby clothes separately or with other similarly lightweight items.
3. Don’t Forget to Check for Loose Items
Before starting the wash, always check pockets and folds of clothes for any small items that could damage your machine or snag fabrics. Baby clothes sometimes hide surprises like tiny toys or pacifiers that can go unnoticed and cause issues during the wash or dry cycle.
4. Don’t Neglect Safety Precautions
Keep the laundry room safe by securing detergent bottles, keeping cords out of reach, and ensuring the washing machine and dryer doors are closed when not in use. This becomes especially important as your baby grows and starts exploring.
When Hand Washing Baby Clothes
Hand washing is a gentle way to care for your baby’s most sensitive fabrics, like knitted blankets, lace outfits, or clothes with special embroidery. But before you head to the laundry room sink, learn the dos and don’ts of hand washing baby clothes to make sure they stay clean, soft, and comfortable for your little one.
DO’s
1. Use Lukewarm Water and a Gentle Detergent
When hand washing baby clothes, fill a clean basin in your laundry room with lukewarm water. Hot water can shrink or damage delicate fabrics, while cold water might not effectively clean certain stains. Add a small amount of baby safe, gentle detergent and swirl it around until it dissolves. Make sure to use a detergent free of harsh chemicals and fragrances to keep your baby’s skin safe.
2. Gently Agitate the Garments
Place the clothes into the soapy water and gently swish them around. Unlike the vigorous spin cycle of a washing machine, hand washing requires a soft touch. Lightly knead the fabric with your hands, focusing on stained areas if needed. Avoid scrubbing or twisting, as this can stretch out the fabric and affect the garment’s shape.
3. Rinse Thoroughly and Use a Towel to Absorb Excess Water
Rinse each item under cool running water until no soap remains. After rinsing, avoid wringing out the clothes; instead, lay them flat on a clean towel. Roll up the towel with the clothes inside and gently press to remove excess water. This helps protect the fabric while getting rid of moisture.
DON’Ts
1. Stay Away from Harsh Scrubbing or Soaking for Too Long
It might be tempting to scrub away stains, but aggressive scrubbing can damage delicate baby fabrics. If you need to treat a specific spot, use a soft cloth or sponge to dab gently. Also, avoid soaking clothes for extended periods; leaving garments in water for too long can weaken the fabric and cause fading.
2. Avoid Overloading the Basin
Trying to wash too many items at once can prevent them from getting thoroughly cleaned. When hand washing, stick to a few items at a time to ensure each garment gets the care it needs. This also makes rinsing and drying more manageable, preserving the quality of each piece.
3. Don’t Skip the Final Rinse
Skipping the final rinse might leave detergent residue on the fabric, which can irritate your baby’s sensitive skin. Make sure to rinse thoroughly until the water runs clear, ensuring all soap is completely removed from the clothes. Residue can also make the fabric feel stiff, so a good rinse is key to keeping those baby clothes soft.
Protect Your Baby’s Clothes the Correct Way – Let Sage Cleaners Wash Them for You!
With all the excitement of having a baby, new parents rarely anticipate the endless loads of laundry that come with it. Protect your baby’s clothes the correct way and let Sage Cleaners take care of the wash for you!
From Brandon, Florida to the entire Tampa Bay area, Florida families trust our expert services every week to make sure their little one’s clothes are soft, clean, and safe to wear. As one of the most trusted laundry services in Florida, we take pride in offering reliable laundry service for busy parents who need a helping hand.
Visit Us:
3248 Lithia Pinecrest Rd., Suite 105, Valrico, FL 33596
Office Hours:
Monday-Friday: 8am – 7pm
Saturday: 8am – 4pm
Sunday: Closed
Contact Us:
Phone: 813-654-8113
Email: care@sagecleaners.com
It’s tempting to throw those brand new sheets on your bed and dive right in. But before you indulge in that first night’s sleep, take a second to consider if those sheets are truly as clean as they look. After all, it’s better to be safe than sorry because even though they’re fresh out of the package, you never really know what they might have picked up during manufacturing, packaging, or even while sitting in the store.
So, this begs the question: just as we wash our clothing items before wearing them, is it also necessary to wash new sheets, even if they’re fresh off the store shelf? Let’s find out, once and for all, if you need to load your new linens into the washing machine before sleeping on them.
Are There Risks If You Don’t Wash New Sheets?
While a new set of sheets, linens, and other bedding items look crisp and spotless at first glance, the smell, however, suggests otherwise. That distinctive “new” scent isn’t just a harmless fragrance; it often indicates the presence of chemicals used in the manufacturing and packaging process – chemicals that could pose risks to your health.
Why should you care and not skip that first wash? Here are the risks you could face:
Risk #1: Skin Irritation and Allergic Reactions
One of the most immediate risks of sleeping on unwashed sheets is skin irritation. The chemicals used to treat and preserve the fabric can cause redness, itching, or even rashes, especially for those with sensitive skin. If you’re prone to allergies, these chemicals can also trigger allergic reactions, making it uncomfortable – or even unsafe – to sleep on the sheets.
Risk #2: Respiratory Issues
Beyond skin irritation, the chemicals and dust new sheets can harbor might also impact your respiratory health. Inhaling these substances night after night can lead to coughing, sneezing, or even flare-ups of asthma symptoms. This is particularly concerning if you have pre-existing respiratory conditions, as the added exposure can make sleeping on unwashed sheets a real health hazard.
Risk #3: Accumulation of Dirt and Germs
New sheets don’t just come into contact with chemicals – they may also accumulate dust, dirt, germs, and even mold spores during the packaging and shipping process. Even if they look clean, these particles can stick to the fabric and transfer to your skin or breathing passages while you sleep. This can result in breakouts and other health problems over time due to an unhealthy sleeping environment.
Risk #4: Compromised Sleep Quality
Sleeping on unwashed sheets can compromise the quality of your sleep. The lingering chemical smell and the stiff, often scratchy texture of new sheets straight from the package make it difficult to relax and drift off. So what should be a restful experience can easily turn into a restless night. Washing them softens the fabric, making your bed more inviting and conducive to a good night’s sleep.
How to Wash New Sheets for the First Time

1 of 6 | Check the Care Label
Before you load your sheets in the washing machine, first check the care label on your new sheets. Different fabrics require different washing techniques, and following the manufacturer’s instructions helps you avoid any mishaps. Whether your sheets are cotton, linen, or a synthetic blend, the label tells you the best water temperature, detergent type, and drying method to use.
Friendly Tip: If the care label suggests cold or warm water, stick with it. Washing in hot water might seem like a good idea for thorough cleaning, but it can cause shrinking or color fading, especially with natural fabrics like cotton.
2 of 6 | Pretreat Any Stains or Odors
Even though your sheets are brand new, you might notice small stains or an off-putting smell when you take them out of the package. Pretreating these areas ensures they come out of the wash looking and smelling fresh.
Friendly Tip: A mild detergent or a little baking soda mixed with water works wonders for pretreating stains or neutralizing odors. Just apply it to the affected area, let it sit for a few minutes, and then toss the sheets in the wash.
3 of 6 | Use the Correct Detergent
Choosing the correct detergent is key to getting your sheets clean without damaging the fabric. A gentle, fragrance-free detergent is usually the best choice because it’s environmentally friendly and best if you have sensitive skin or allergies. This helps remove any lingering chemicals from the manufacturing process without adding any new irritants.
Friendly Tip: Avoid using too much detergent—a little goes a long way. Too much soap can leave residue on your sheets, making them feel stiff or causing skin irritation.
4 of 6 | Skip the Fabric Softener
While it might be tempting to add fabric softener to your wash for that extra softness, it’s often not the best choice for new sheets. Fabric softeners leave a coating on the fabric that reduces its breathability and absorbency.
Friendly Tip: If you’re looking for a natural way to soften your sheets, try adding a half-cup of white vinegar to the rinse cycle. It helps soften the fabric and removes any leftover detergent without leaving a scent.
5 of 6 | Dry with Care
How you dry your sheets makes a big difference in how they feel and last. Tumble dry on a low heat setting or air dry them to prevent shrinking and to keep the fibers intact. High heat is tough on sheets, leading to wear and tear over time.
Friendly Tip: To keep your sheets from getting tangled in the dryer, add a few dryer balls or clean tennis balls. They help keep the sheets moving and reduce drying time.
6 of 6 | Iron for a Crisp Finish (Optional)
If you love the look and feel of crisp, wrinkle-free sheets, give them a quick iron after they’re dry. This step is totally optional but can add a touch of luxury to your bedding.
Friendly Tip: Iron your sheets while they’re still slightly damp. This makes it easier to smooth out any wrinkles and gives your sheets a fresh, polished look.
Sleep Soundly on Clean Sheets – Get Them Washed at Sage Cleaners!
New sheets carry a surprising amount of dust, chemicals, and other residues from the manufacturing process to the time they spend sitting on store shelves. To ensure your bedding is as clean and safe as possible, trust Sage Cleaners to give your new sheets the thorough wash they need. Our wash and fold laundry and dry cleaning services remove all those hidden irritants, leaving you with fresh, comfortable sheets.
We also offer convenient pickup and delivery across Florida, including Apollo Beach, Brandon, Clearwater, Plant City, and Valrico. For more information about our service areas or to schedule a pickup, visit our website or call our customer service support at 813-819-6658.
Understanding color bleed begins with recognizing the mishap – a bright-colored red shirt has turned your laundry water into a swirling palette, and suddenly other items are sporting unintended hues. You pull your favorite white casual dress out of the washing machine and it is now a dull shade of red. It’s a heart-sinking moment that we’ve all experienced at some point, and to say it’s frustrating is an understatement.
But while the initial shock can be overwhelming, it also serves as a critical learning moment. This unfortunate experience highlights the importance of proactive measures in laundry care, specifically, how to prevent such mishaps before they happen.
By understanding the causes of color bleeding and implementing some straightforward strategies, you can keep your clothes looking as good as new. That’s exactly the purpose of this article – to share with you the 7 Most Effective Ways to Prevent Color Bleeding in Laundry.
What is Color Bleeding and Why Does it Happen?
Color bleeding is when the dye from one garment transfers onto other clothes during the wash cycle. This often results in unexpected and unwanted splashes of color on clothes that were originally much different hues. You know the scenario: you toss a new red shirt in with your white tees, and suddenly everything’s pink. But why does this happen really?
Causes of Color Bleeding
1. Excess Dye in New Clothes
New clothes, especially those with vibrant colors, often have excess dye that hasn’t completely set into the fabric. This loose dye can easily come out in the wash and transfer to other items.
2. Using Hot Water
Hot water can cause dyes to loosen from the fabric and spread to other clothes. This is especially true for fabrics that aren’t colorfast or for those that haven’t been washed several times before.
3. Overloading the Washing Machine
Stuffing the washing machine to the brim can prevent clothes from moving freely. This means dyes have a greater chance of transferring from one garment to another due to the constant friction.
4. Poor Dye Quality
Sometimes, it’s just the quality of the dye. Lower-quality dyes are more likely to bleed because they haven’t properly bonded to the fabric fibers.
5. Fabric Types
Certain fabrics are more prone to bleeding. Natural fibers such as cotton, linen, and silk tend to release dye more readily than synthetic fabrics like polyester.
Common Instances of Color Bleeding
New Jeans and Whites
One of the most common culprits of color bleeding is new denim. Denim jeans, especially in darker washes, are notorious for bleeding dye, which can turn your crisp white shirts or towels a murky shade of blue. Always wash new jeans separately or with similarly colored items to avoid this mishap.
Bright Reds and Darks
Red clothing items, such as that bright red dress you adore, are another frequent offender. Reds tend to bleed easily, especially when washed with lighter colors. This can result in a wardrobe of clothes all tinged with an unwanted red hue.
Towels, Bedding, and Linens
Towels and linens, due to their thick and absorbent nature, can both cause and be affected by color bleeding. For instance, a new red towel can easily turn a load of white linens into a pink disaster. Similarly, brightly colored bed sheets can transfer dye to pillowcases and duvet covers.

7 Must-Do Steps to Avoid Color Bleed in the Wash
Here’s a straightforward guide to avoiding color bleed, ensuring every load of laundry comes out just as vibrant as when it went in.
1) Sort Your Laundry by Color
The first thing you want to do is divide your laundry into three main categories: lights, darks, and bright colors. Whites and light colored fabrics should be washed separately from dark and bright colors. This prevents dark dyes from transferring onto lighter fabrics, which is a common cause of color bleeding.
2) Turn Clothes Inside Out
Turning clothes inside out before washing helps protect the outer layer of your garments from friction and direct contact with other clothes. This method is especially beneficial for darker and more vibrant colors, which are more prone to bleeding. Denim jeans and bright red shirts are prime candidates for this treatment. By turning them inside out, you not only help maintain their original color but also prevent them from staining other clothes in the wash.
3) Use Cold Water
Washing your clothes in cold water is less likely to cause colors to bleed compared to hot water. Cold water helps keep dyes locked in and is also gentler on fabrics, making it a win-win for your laundry routine. For best results, always check the care labels on your clothes. Some delicate fabrics and brightly colored garments explicitly recommend cold water washes. If you’re unsure, it’s safer to go with cold water, especially for items that are prone to bleeding, like dark jeans, red shirts, and brightly colored towels.
4) Choose the Right Detergent
Color safe detergents are designed with special ingredients that stabilize dyes within the fabric, preventing them from leaching out during the wash cycle. Stick to mild detergents without bleach, especially for colored fabrics. If you need to brighten whites, opt for oxygen based bleach, which is less likely to cause bleeding and is gentler on your clothes. Make sure to use the recommended amount of detergent, as using too much can lead to residue buildup, which can cause color bleeding.
5) Add a Color Catcher Sheet
Color catcher sheets are a great addition to any wash load. They absorb loose dyes in the water, preventing them from settling on other clothes. When you toss one into the washing machine, it acts like a magnet for dyes, locking them into the sheet instead of allowing them to settle on your clothes. This means that even if a new pair of red socks starts bleeding dye, the color catcher sheet will soak it up before it can turn your whites pink.
6) Pretreat New Clothes
New garments often have excess dye that hasn’t fully set, and this dye can easily transfer to other items in the wash. Which is why, before washing new clothes, soak them in a mixture of water and white vinegar or salt. This helps set the dye and reduces the likelihood of it bleeding during future washes. After soaking, wash these items separately in cold water. If you’re unsure whether a new garment will bleed, do a colorfastness test. Wet a small, hidden area of the fabric and press a white cloth or paper towel against it. If any dye transfers to the cloth, the item is likely to bleed in the wash. Pretreat it accordingly and continue to wash it separately until the dye stops running.
7) Dry with Care
How you dry your clothes can also affect color bleeding. Avoid high heat settings in the dryer, as they can cause dyes to break down and transfer. Instead, use a low heat setting or air dry your clothes. Air drying is particularly gentle and helps maintain the color and shape of your garments. When air drying, make sure to hang items in a well-ventilated area. Avoid direct sunlight, as prolonged exposure can fade colors over time. Instead, opt for a shaded spot where your clothes can dry evenly.
Remember: While these steps can significantly reduce the risk of color bleed, using a professional wash and fold laundry service is the best way to ensure your clothes maintain their vibrant colors. Professionals have the expertise and equipment to handle delicate fabrics and prevent color transfer, offering peace of mind that your laundry will come out perfect every time.
Want to Keep Your Colors Bright? Call Sage Cleaners for Expert Help!
If you’re in Tampa, Florida, and looking to keep your favorite sweater and other garments looking fresh and vibrant, look no further than Sage Cleaners. As the premier dry cleaners in Tampa, we pride ourselves on putting customer satisfaction at the forefront of everything we do.
We provide prompt and professional wash and fold laundry service to residents and businesses in Tampa, Florida and its surrounding areas. Customers can choose to have their laundry picked up and delivered to their homes for free or use any of our retail locations.
Give us a call at 813-654-2323 to book a service or email us at care@sagecleaners.com to inquire more about our services!
How to Get Lipstick Stain Out of Clothes Within Minutes
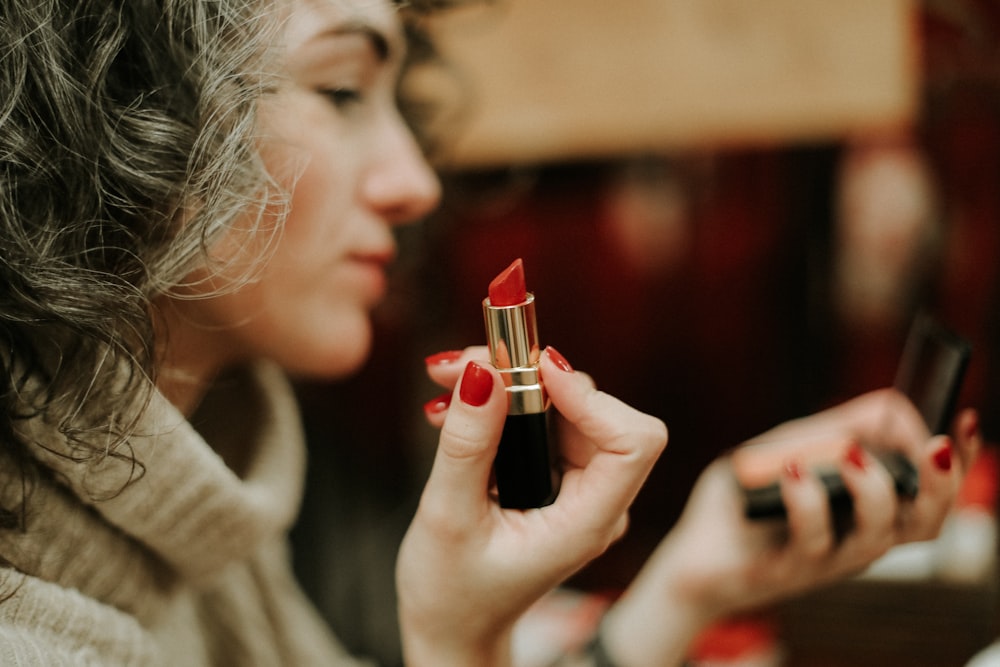
Getting lipstick on your pretty dress is certainly frustrating, and when it does happen, your first thought would probably be how to get lipstick out of clothes. While a tiny smudge won’t initially ruin the overall quality of your clothes, time will come though that it will when the fabric absorbs the stain deeper into its fibers.
So how do you remove lipstick stain before it spreads, or worse, become permanent? Fortunately, there are different lipstick stain removal techniques that you can try anytime, and many of them you can do effortlessly. Keep reading to learn what these are!
Why is Lipstick Stain Often a Problem?
Almost all lipstick stains are solvent-based, and made with waxes, oils, and dyes, which are all challenging substances. Lipstick shades, especially those in vivid or deep colors, often contain concentrated pigments. These intense pigments are designed to provide striking lip color. However, when lipstick comes into contact with fabric, its composition can make it challenging to remove.
Different fabrics react differently to lipstick stains. Delicate and porous fabrics, such as silk or chiffon, are more susceptible to absorbing the oils and pigments in lipstick, making stains more difficult to remove.
Lipstick stains can withstand standard laundering processes. Washing machines alone may not be sufficient to completely eliminate the stain, especially if it has already set.
How To Prevent Lipstick Stains on Clothing in the First Place
To prevent lipstick stains, consider the following precautions:
- Apply lipstick carefully, ensuring it doesn’t smudge onto clothing.
- Use lip liners or lip primers to create a barrier between lips and fabric.
- Opt for long-lasting or transfer-resistant lip products.
- Be mindful when eating or drinking to avoid contact between lips and clothing.
- Carry a stain remover pen or wipes for quick action if a stain occurs.
- Check clothing for lipstick marks before laundering or dry cleaning to prevent setting stains.
What to Do When You Get Lipstick On Your Clothes
When you find yourself with a fresh lipstick stain on your clothing, swift action is key to getting the stain out. Here’s a concise guide on what to do when lipstick has just come into contact with your clothes:
- Act quickly. Old stains are much harder to deal with than new stains. So when you notice a lipstick stain on a piece of clothing, act quickly. You may scrape off the excess lipstick using the edge of a credit card. This will make removing the stain much easier.
- Check the label. The most important part of that label is what your clothing is made from. Since some materials react poorly to certain chemicals, it’s best therefore to entrust them to your trusted local dry cleaner. Delicate fabrics like silk may need gentler treatment, while more robust materials like denim can withstand more rigorous approaches.
- Blot, don’t rub: Avoid rubbing the stain, as this can spread it and embed it deeper into the fabric. Instead, gently blot it with a clean cloth or paper towel. This helps lift excess lipstick without worsening the situation.
6 Ways to Remove Lipstick Stain From Clothes
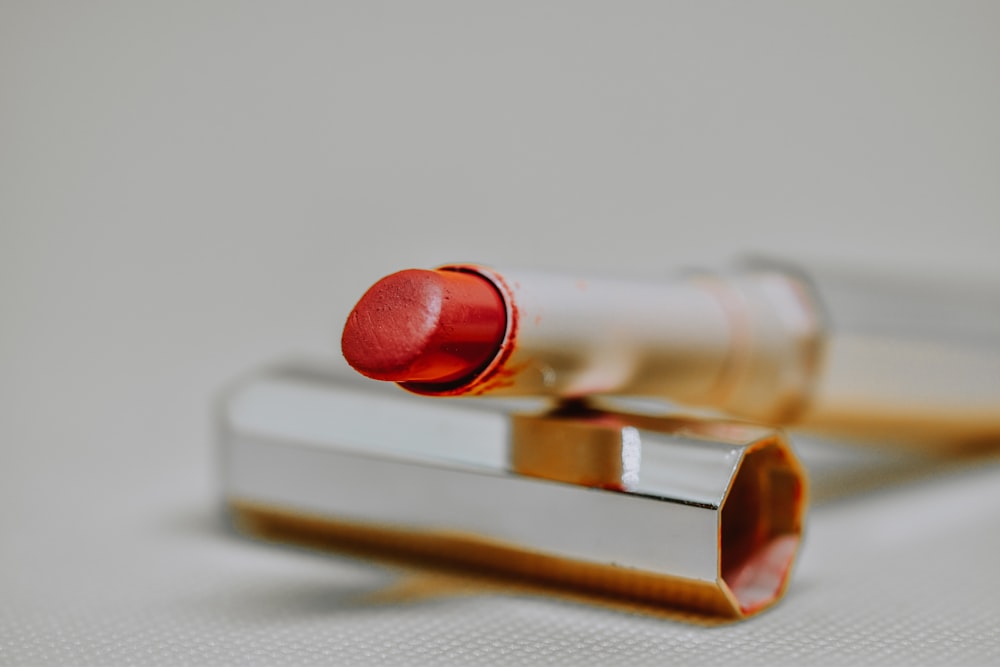
#1: Use Dish Soap and Warm Water
Dish soap is an excellent option for removing lipstick from garments. Mix a small amount of dish soap with warm water and apply it directly to the stain. Gently rub the fabric together, and then rinse it with cold water. This method is particularly effective for fresh red lipstick stains.
#2: Try Rubbing Alcohol
Rubbing alcohol can be a lifesaver when it comes to getting lipstick stains out of clothing items. Dampen a white cotton ball with isopropyl alcohol and gently dab it onto the stain. Blot the stain with a clean cloth until the lipstick transfers onto the cloth. Rinse with cold water and repeat if necessary.
#3: Hairsprays are a must-try too!
Hairspray isn’t just for your hair – it can also help you remove lipstick from clothes. Spray a small amount of hairspray onto the lipstick stain and let it sit for a few minutes then blot it with a clean cloth. Rinse with cold water and check if the stain is gone. If not, repeat the process.
#4: Clean it with Baking Soda and Lemon Juice
A paste made from baking soda and lemon juice can work wonders on stubborn lipstick stains. Mix the two ingredients to form a thick paste, and then apply it directly to the stain. Let it sit for about 15 minutes, and then gently scrub the stain with a toothbrush. Rinse with cold water and check for any remaining residue.
#5: White Vinegar Solution
White distilled vinegar is known for its stain-removing properties. Mix equal parts of vinegar and warm water, and apply the solution to the lipstick stain. Blot the stain with a cloth and rinse with cold water. This method can be effective for both fresh and set-in lipstick stains.
#6: Consider Laundry Detergent and Stain Remover
For particularly stubborn lipstick stains, consider using a liquid detergent and a stain remover. Apply the detergent directly to the stain, followed by the stain remover. Follow the instructions on the stain remover’s label for the best results. After treating the stain, wash the garment according to the care label instructions.
Did You Find These Tips Helpful?
We hope you’ve found our tips on removing lipstick stains from clothing both informative and practical. Lipstick stains can be a pesky issue, but with the right knowledge and techniques, you can tackle them effectively. Whether you’re dealing with a fresh smudge or an old set-in stain, prompt action and the right approach can help you keep your clothes looking their best. Remember, a little patience and a touch of know-how can make lipstick stains vanish without a trace.
Frequently Asked Questions
Q: Why is it important to check the care label?
A: Care labels typically include information on washing, drying, ironing, and other specific care instructions. When dealing with stains like lipstick, following the care label’s recommendations can help you avoid using methods or products that might damage the fabric or color.
Q: Is it safe to use rubbing alcohol on all types of fabrics?
A: Rubbing alcohol helps remove a lipstick stain from many fabrics, but it’s not suitable for all types. It is generally safe for most cotton, polyester, and synthetic fabrics. However, it’s essential to test a small, inconspicuous area of the fabric first to ensure it won’t cause damage or discoloration. Avoid using this cleaning solution on delicate fabrics like silk or wool, as it may harm them.
Removing Lipstick Stains from Delicate Fabrics
A: Yes, they can be removed from delicate fabrics like silk or wool, but extra caution is needed. Use gentle stain removal methods, such as a mixture of mild dish soap and water, and avoid vigorous rubbing or scrubbing, which can damage the fabric. Always test any stain removal method on an inconspicuous area of the fabric first to ensure it won’t cause harm. If you’re uncertain or concerned about potential damage, consider consulting a professional dry cleaner experienced in handling delicate fabrics.
Q: Is lemon juice really effective as a lipstick stain remover?
A: The natural acidity of lemon juice can help break down and lift lipstick from fabric, so yes, it can be effective. To use it for this purpose, apply it to the stained area, allow it to sit for a brief period, and then gently blot and rinse the area. However, it’s important to be cautious when using it on fabric, as it has an acidic nature.